Xero
Pry integrates with Xero to sync with your accounting data through API access. Our API is a secure connection that doesn't share password data and can be revoked at anytime via the Xero.
Once synced, your financial data will be categorized in a familiar manner.
Data Flow
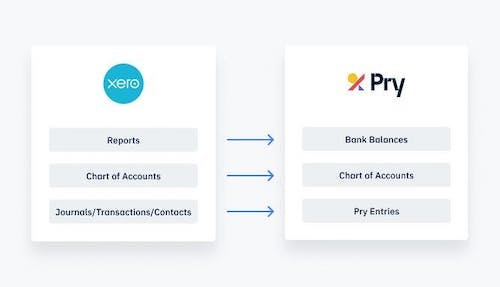
Pry syncs with your General Ledger on Xero. Your chart of accounts and your transactions will be synced to Pry.
It's a one-way sync from Xero to Pry, Pry does not revert any changes back to Xero. Any changes on your Xero account will be reflected on Pry when the next sync is triggered.
Connect with Xero
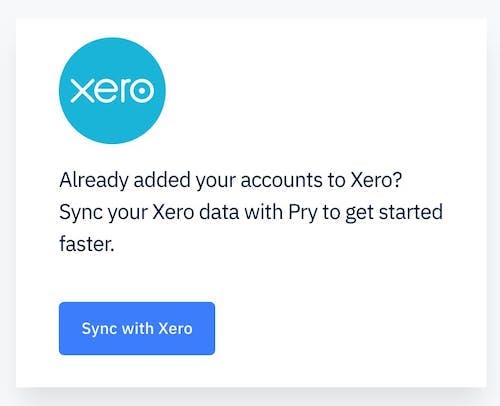
To connect your Xero account to Pry, follow these steps:
- Go to the Get Started page.
- Update your project name. Save and continue.
- Click Sync with Xero and follow the Xero authentication process.
1. Log in to Xero.
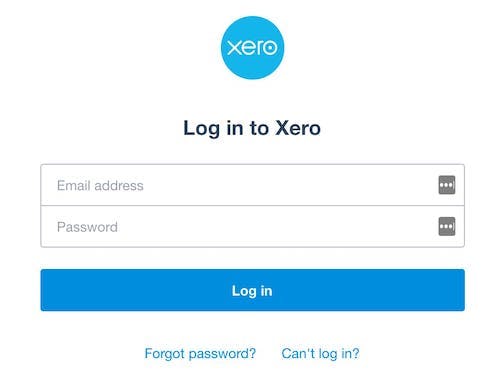
2. Select the organization you want to connect to and click Allow Access.
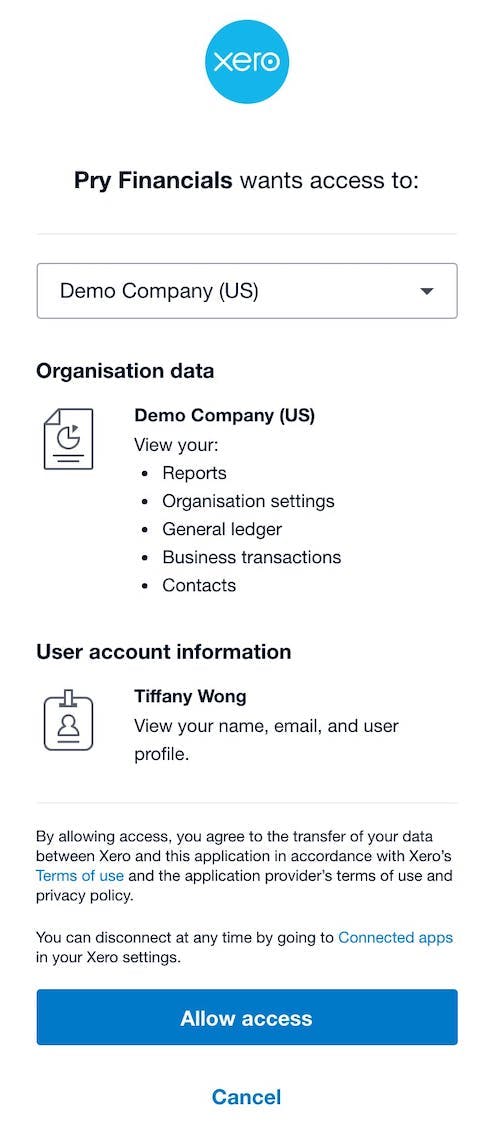
3. Your Xero data will now be synced on Pry.
Data Sync
- We sync with Xero once a day automatically.
- If you want to sync with Xero manually, click on the user icon on the top right. Click on Accounts > Sync with Xero. It will bring all the new updates from your Xero account in real time.
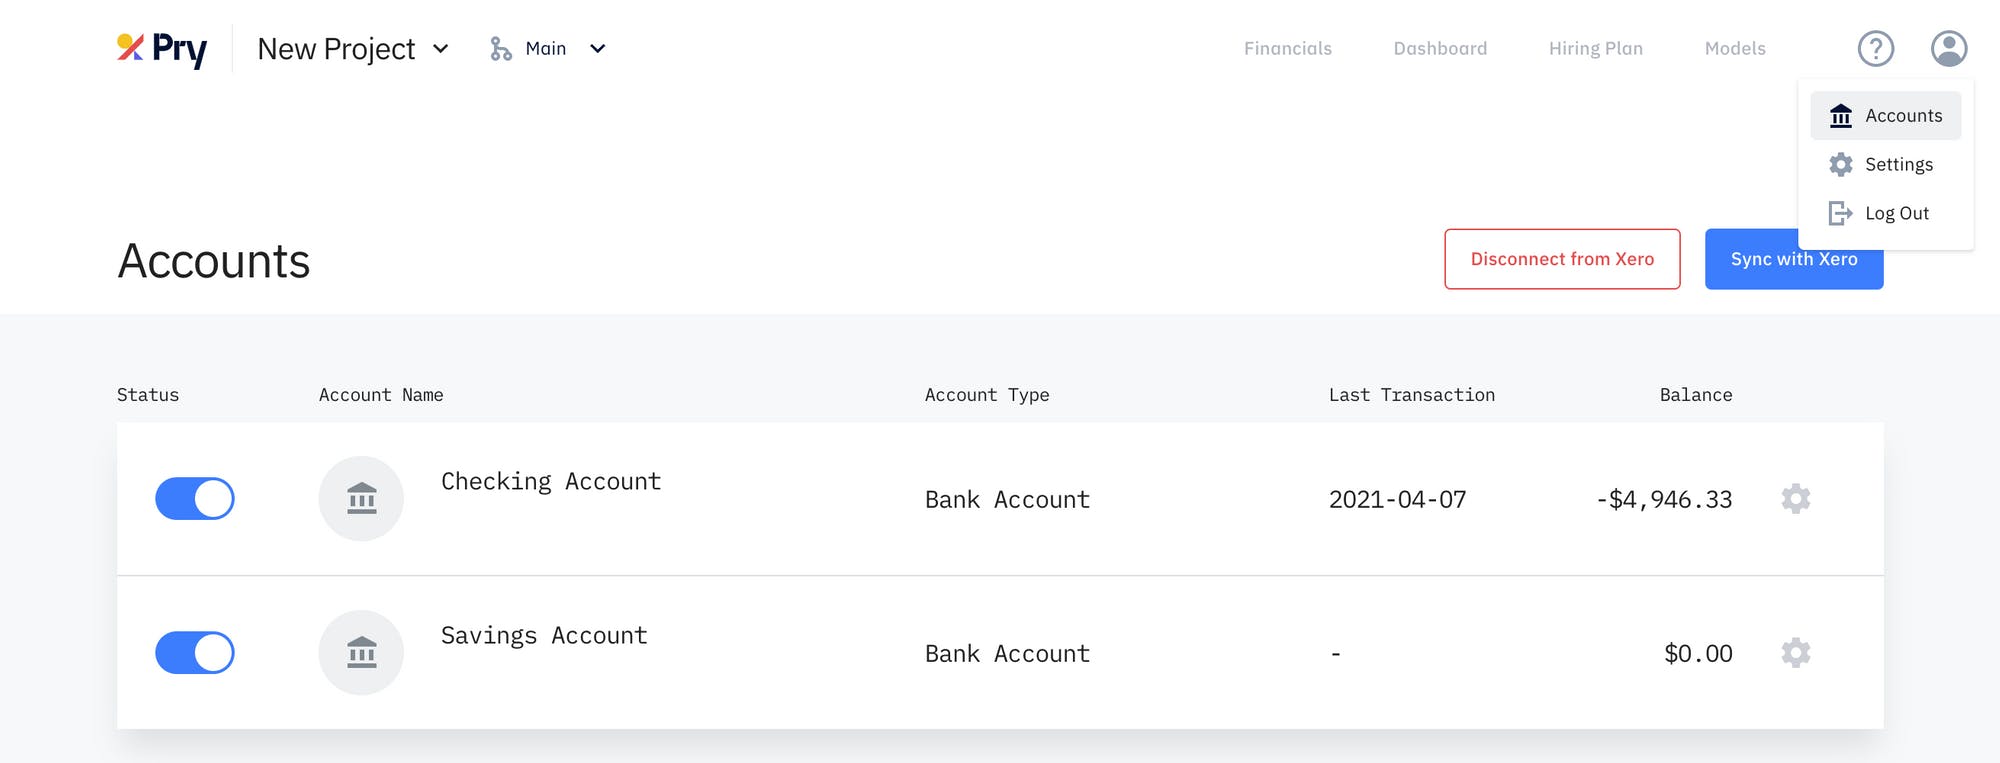
Disconnect from Xero
- To disconnect your Xero connection, go to your Accounts page and click Disconnect from Xero.
- You can also disconnect your Xero connection from your Xero account.
Tracking Categories
If you use Xero tracking categories, you are able to import them as Pry tags in order to run reports or filter by Classes. Here are the steps to sync Xero Tracking Categories:
- Connect to your Xero account during the setup process. If you have skipped the initial connection page, you can go back to Accounts page.
- After connecting to your Xero account, head to the Financials tab and click on any cell. After that, click on the Tags tab followed by Manage Tags.
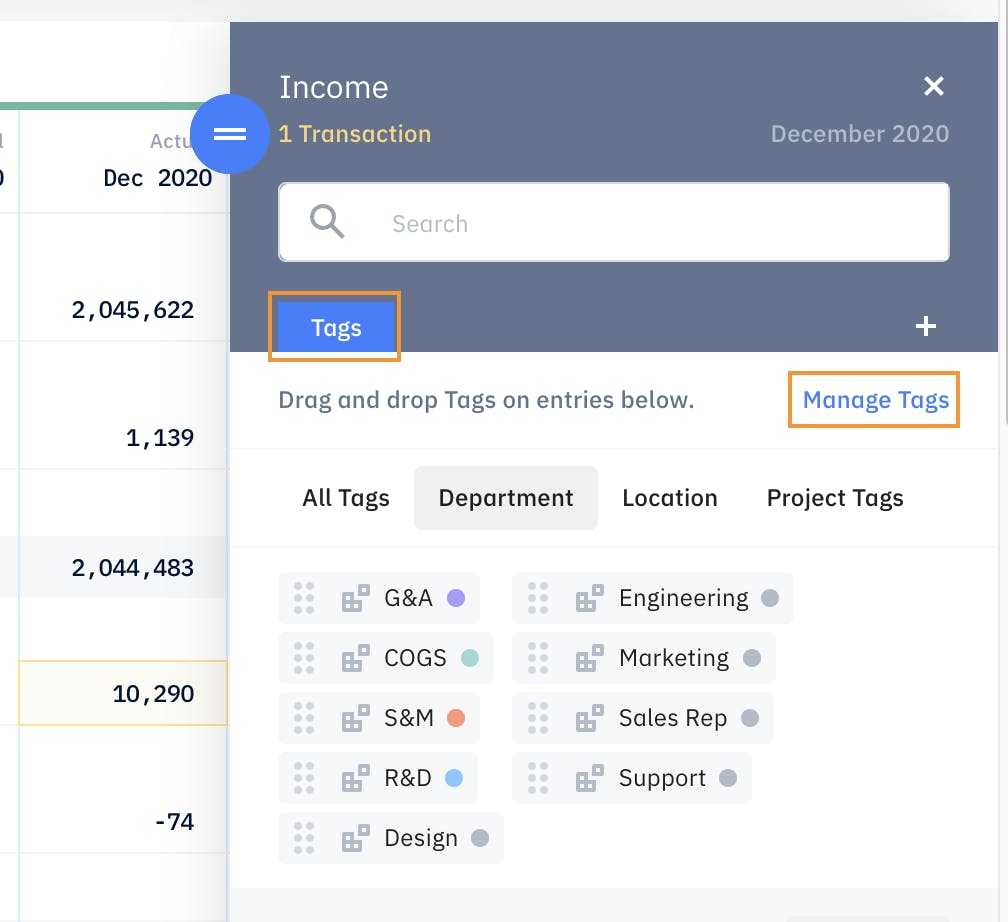
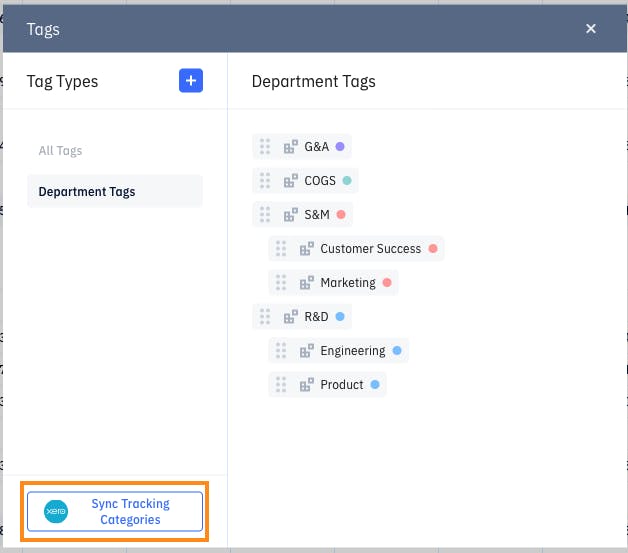
- On the Tag Management Interface, click on Sync Xero
- Use the Pry Tag Management Interface to map Xero Tracking Categories to departments or create a New Pry Tag for the Xero Categories.
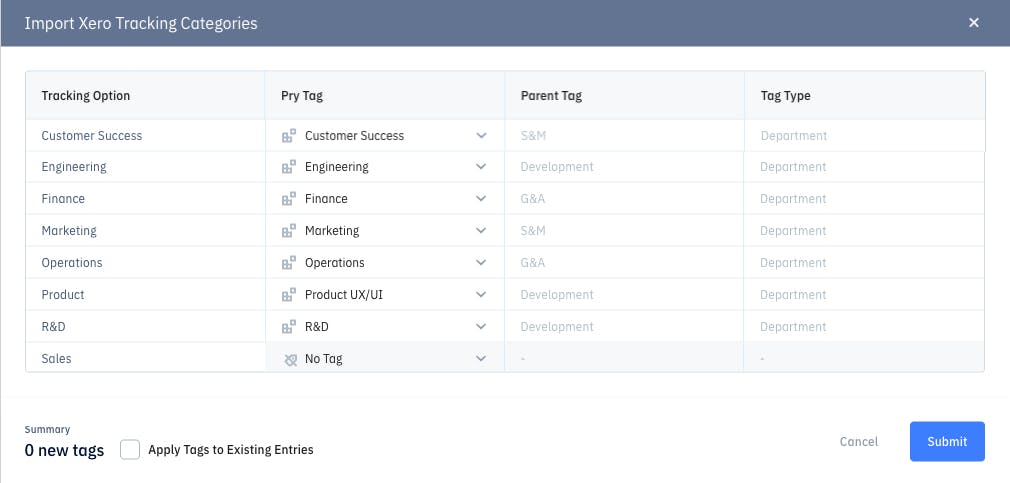
- Once you are done mapping all the Xero Categories, make sure the box to Apply Tags to Existing Entries is checked. Press Submit when done. Your historical transactions should now contain the Pry tag with the Categories you have synced over.
Tip:With the Xero Tracking Categories integration, you can create custom reports based on Classes or filter transactions with those Categories by using the Search field on the Financial Report.
Roll-up Summary
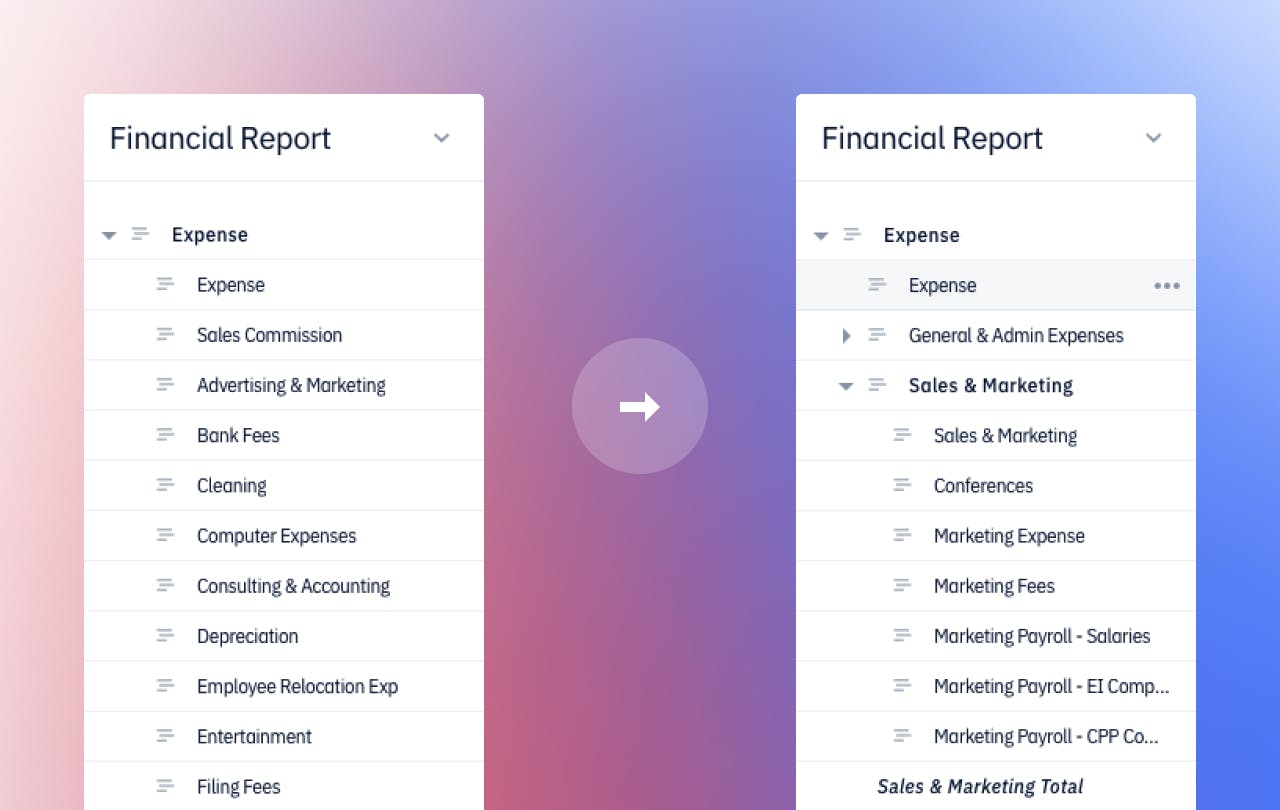
With Pry, you can create a roll up summary with your Xero Chart of Accounts data. This allows you to gain high level summary of your expenses while also giving you the ability to drill down on your transaction data.
Here is an example of an outcome, keep in mind you can customize the parent account to fit your needs:
How To
Follow these steps to reorganize your Xero data in minutes. Most Xero users prefer to reorganize Expense accounts, but you are free to do so for Income/Cost of Goods Sold/Assets/Liabilities/Equity accounts as well.
- Create all your "Parent" categories by right clicking on Expense and clicking +Add Sub-Account. If you already have created an account and it disappeared, click on the Gear icon between the Search bar and your Financial Report and toggle Empty Accounts.
- Drag your Xero accounts and drop them inside the Parent category which you created in Pry. Keep in mind you must maintain them on the same level of hierarchy. For example, you cannot drag an Expense account into an Asset account.
- Expand or Collapse your Parent categories to see a subset of sub accounts.

Tip:You can use our Ranked List Chart on the dashboard feature to see a high level of expense summary with the newly created parent categories by selecting Expense as the data group or a list of the itemized accounts by selecting the Parent category as the data group.