Financial Modeling
Pry's financial models are designed to be highly customizable and capable of modeling anything you would usually use Excel for. Use it to model revenue, customize overhead per employee, or calculate KPIs.
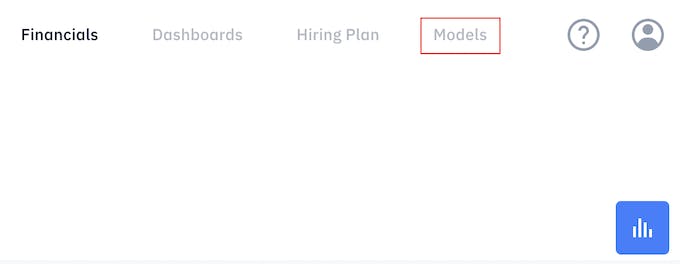
Click on Models on the navigation bar in the top right corner to access the Models feature.
TipNot all financial projections should be done in financial modeling. Review Simple Forecasting or Hiring Plan for other ways of building financial projections.
Creating and Managing Models
By default, every Pry project comes with 2 pre-built financial model templates(revenue and expense) as a reference. You can customize financial models based on your business model.
Click on the models dropdown to:
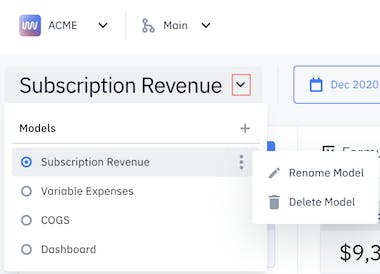
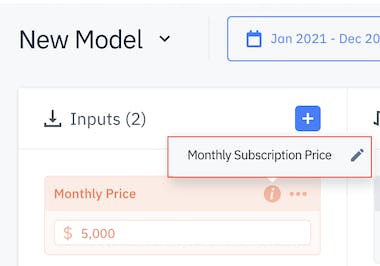
Create a Model - Open the Models menu by clicking on dropdown icon next to the name of the model. Then click on the + button to create a new model.
Switch between models - From the dropdown, click on the new model to switch the view to that model.
Rename a Model - Open up the Models menu. Hover over the list of models and click on the 3 vertical dots on the right. Click "Rename Model" to replace the name.
Delete a Model - Hover over the list of models and click on the 3 vertical dots on the right. Click "Delete Model" to delete that model.
After you're done building your financial models, scroll down to view the models table. On the models table, you can view your metrics and see how they change over time.
Adjusting Model Date Range
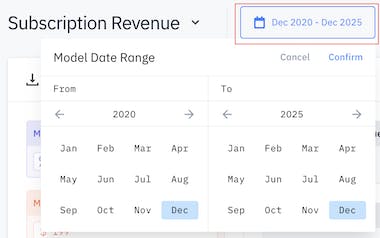
Use the model date range to set the beginning and end date of your financial model. Each model has its own respective date range separate from the financial report date range. You can set the end date beyond the standard 5-year projections, but a maximum of 5-year forecasts will be displayed at a time. After you select the month & year, click "confirm" to save your changes.
Creating a Variable
Variables are time series. There are 3 types of variables:
- Inputs are the key drivers or assumptions of the company
- Formulas calculate the values.
- Outputs map the selected values to the financial report.
Built-In Pry Variables
You can reference pre-built variables from the Financial Report(account balance) or Hiring Plan(employee count, new hire, salary). Learn more about the variables on our pre-built models functions reference page.

Variable Names Must Be Unique
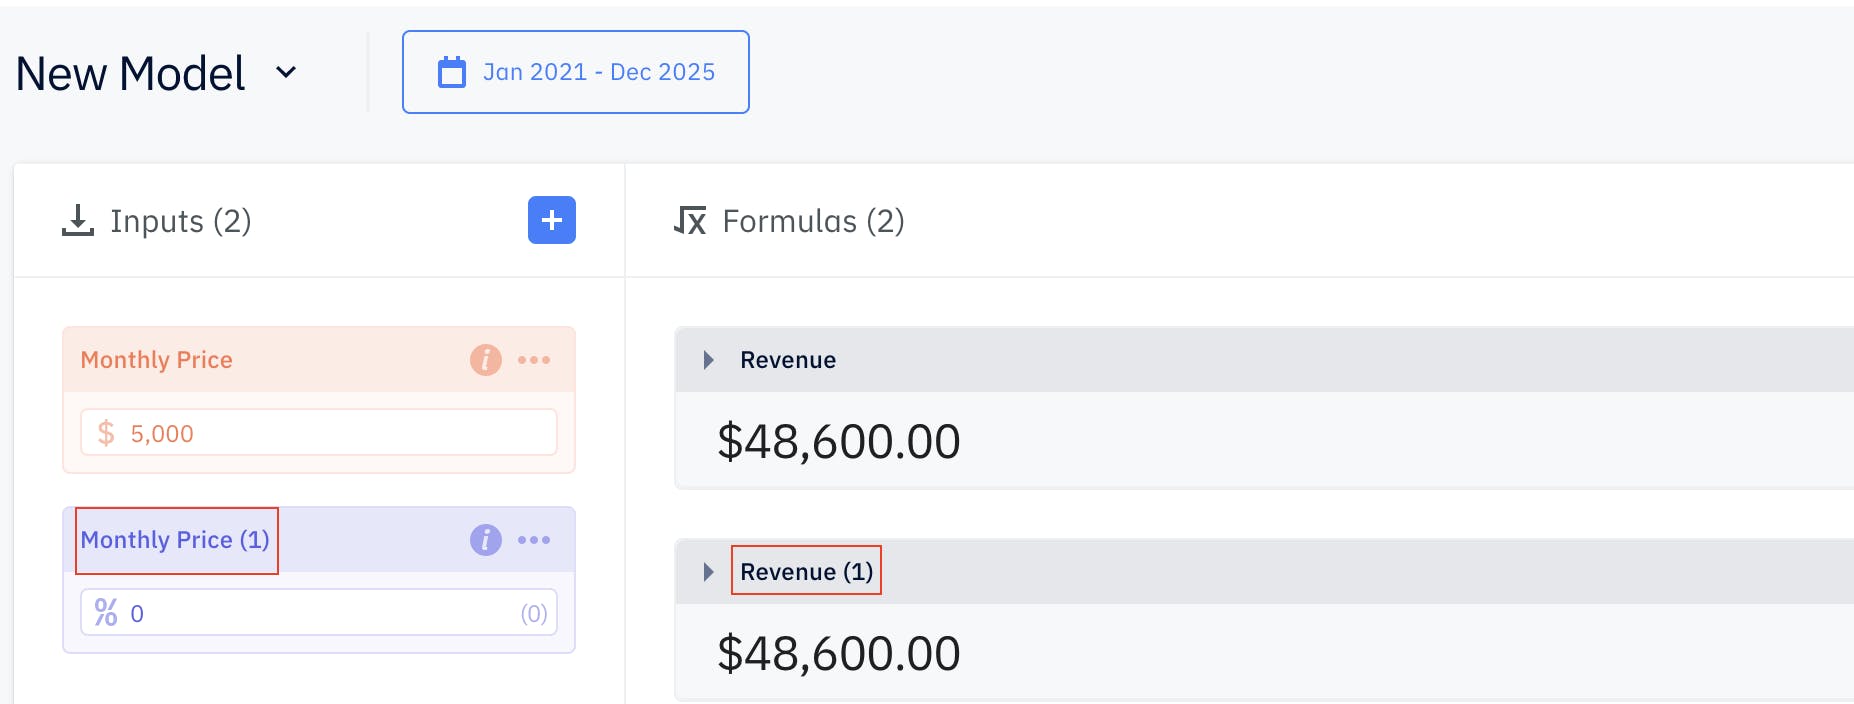
Variable names must be unique across all models. If a variable name is repeated, it will generate a (1) at the end of the name to differentiate between the same variable names.
Adding Descriptions to Variables
Adding descriptions to variables is useful if you want them to show up on the dashboard. To add a description, click on the i icon next to the variable and click on + Add Description.
Inputs
There are many types of inputs that are used for key assumptions and drivers:
Number
Number inputs are used for number formatted assumptions such as initial customer count.
Currency
Currency inputs are used for assumptions with currency values associated to it such as monthly pricing.
Percentage
Percentage inputs are used for percentage assumptions such as monthly growth rate.
Date
Date inputs are used for specific date assumptions such as Expected Fundraising Month.
List
You can manually enter the value of each month with a list input. If you want to set the value for future months, click on blue arrow. Some common assumptions with list variables are variable growth rates or keeping track of actual metrics.

TipAfter an input is created, you can convert the input type by clicking on the 3 horizontal dots > Convert Type. Note that for list inputs you are not able to convert the type. Instead, delete it and create a new input.
Formulas
Creating Formulas
To create a new formula, click on the + icon next to Formulas within a Model.
Expand to view
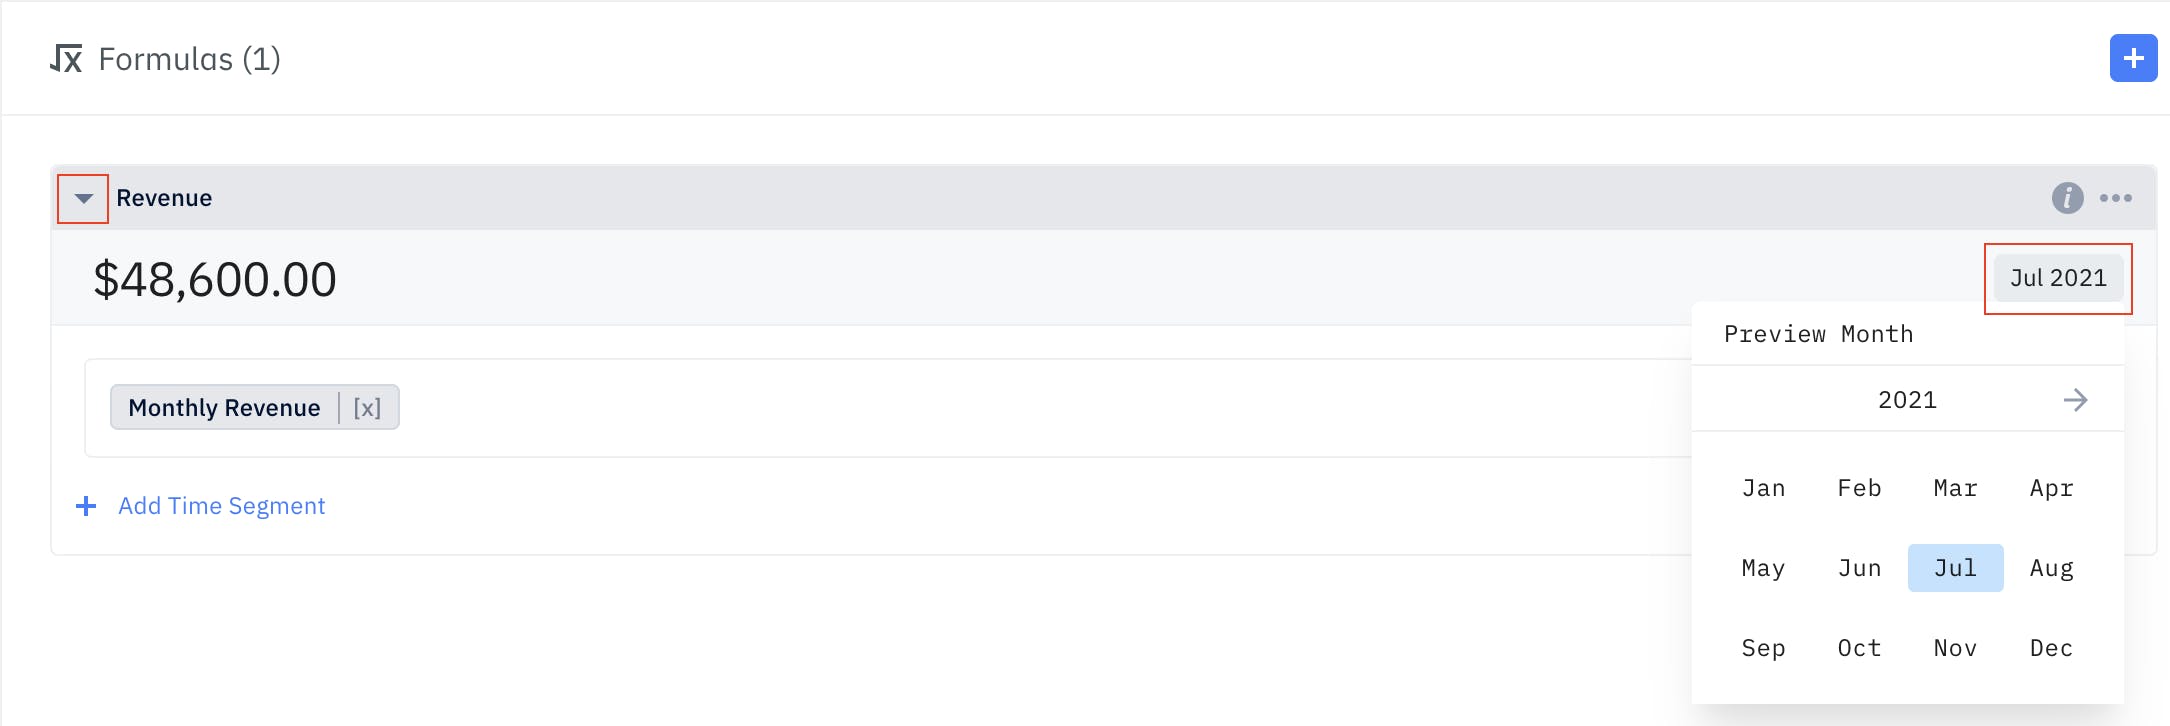
To view the breakdown of a formula, click on the drop-down to the left of the formula name.
Preview value
The value displayed is the result of the functions within the formula.
Set Preview Value Month
You can preview the value of any given month. To set the preview month, click on the Month-Year to the right of the preview value.
Type Auto Detecting
As you are typing in the formula section, our system will start detecting a list of variables that match the text automatically. Click on the variable or press Enter key on your keyboard to select it.
Time Segments
Time segments are useful if you want to use different functions for different time periods.
Add Time Segment
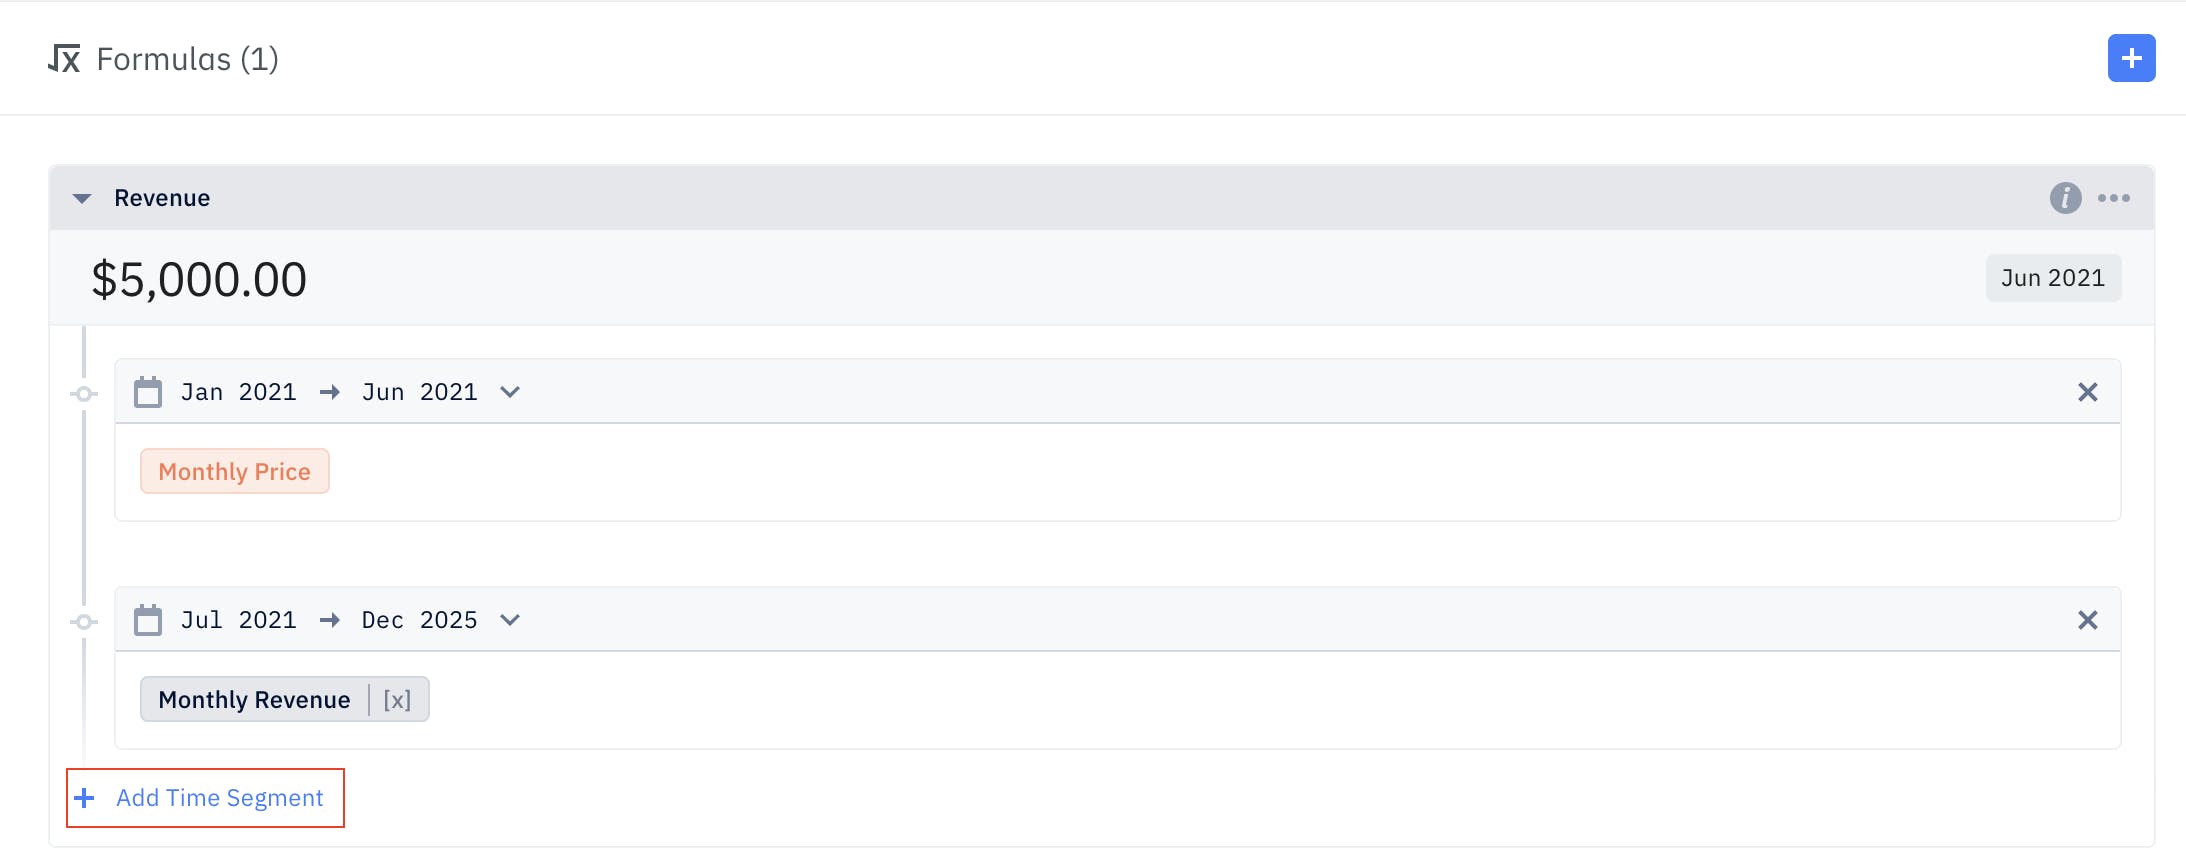
To add a new time segment, expand on the formula drop-down. Click on "+ Add Time Segment" and it'll display an additional time period. Customize the functions in each time segment (they should be different).
Adjust Time Segment
To adjust a time segment, click on the Month-Year field at the top of the function. Select the "From" month based on when it should start and the "To" month based on when it should end. The time segments should be continuous and without any gaps or overlap.
Delete Time Segment
To delete a time segment, click on the "X" to the right of the time segment you want to delete. The deleted time segment will disappear and the functions will reference back to the model date range.
Referencing Variables
To reference a variable, start typing the variable name in the formula section and our system will start detecting a list of variables that match the text automatically. Click on the variable or press the Enter key to select it.
Self Referencing Variables
Each formula is a variable itself. You can reference any formula across any model in a form of a variable. If you reference itself as a variable, it will automatically set the range of the self variable to be [x-1], the previous month's value.
Referencing a Hiring Plan Row
You can reference variables from the hiring plan row for both employees and contractors.
Employees - employee count, new hire, and total base salary
Contractors - contractor count, contractor new hire, contractor(department) for the costs.
You can also filter it by department or role. For more details, check out our Pre-built models functions reference.
Referencing a Financial Report Row
You can reference variables from your financial model for both actuals and forecasts. Simply type Account Balance and its category. Use x - (n) to reference past actuals and use x + (n) in the range to reference future forecasts. For more details, check out our Pre-built models functions reference.
Variable Offset
The (x) in the formula represents the variable's value in the current month.
Actuals - Use x - (n) if you want to reference previous months. For example, x - 1 represents the variable's value one month ago and x - 2 represents the variable's value 2 months ago.
Forecasts - Use x + (n) if you want to reference future months. For example, x + 1 represents the variable's value next month and x + 2 represents the variable's value in 2 months.
Outputs
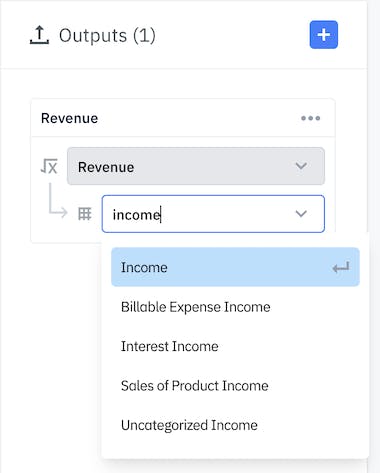
After you're done setting up the formulas, create an output to map the formula's value to the financial report.
Click on the + next to the output to create an output. Select the formula you want to reference to and then select the output (expense category) you want to map to on the Financial Report.
Changing Outputs on Financial Report
You can change the outputs directly on the financial report without needing to access your models.
On the financial report, select the cell where your output is mapped to. Click on the entry to drag and drop it to the right account. This follows the same method as Moving a Forecast.
Deleting Outputs on Financial Report
You can delete the outputs directly on the financial report without needing to access your models.
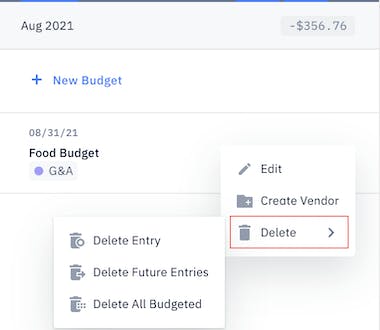
On the financial report, select the cell where your output is mapped to. Click on the 3 horizontal dots on the right and click delete.
Similar to deleting a forecast entry, you can delete the selected entry only, delete future entries, or delete all forecasted entries.
Please note that although your entries are deleted on the financial report, the output will still remain on the Model.
If you no longer want the output value to display on the financial report, simply delete the output by going to the Model > click on the 3 horizontal dots next to the output > Delete.