Integrations Home Page
Home Page
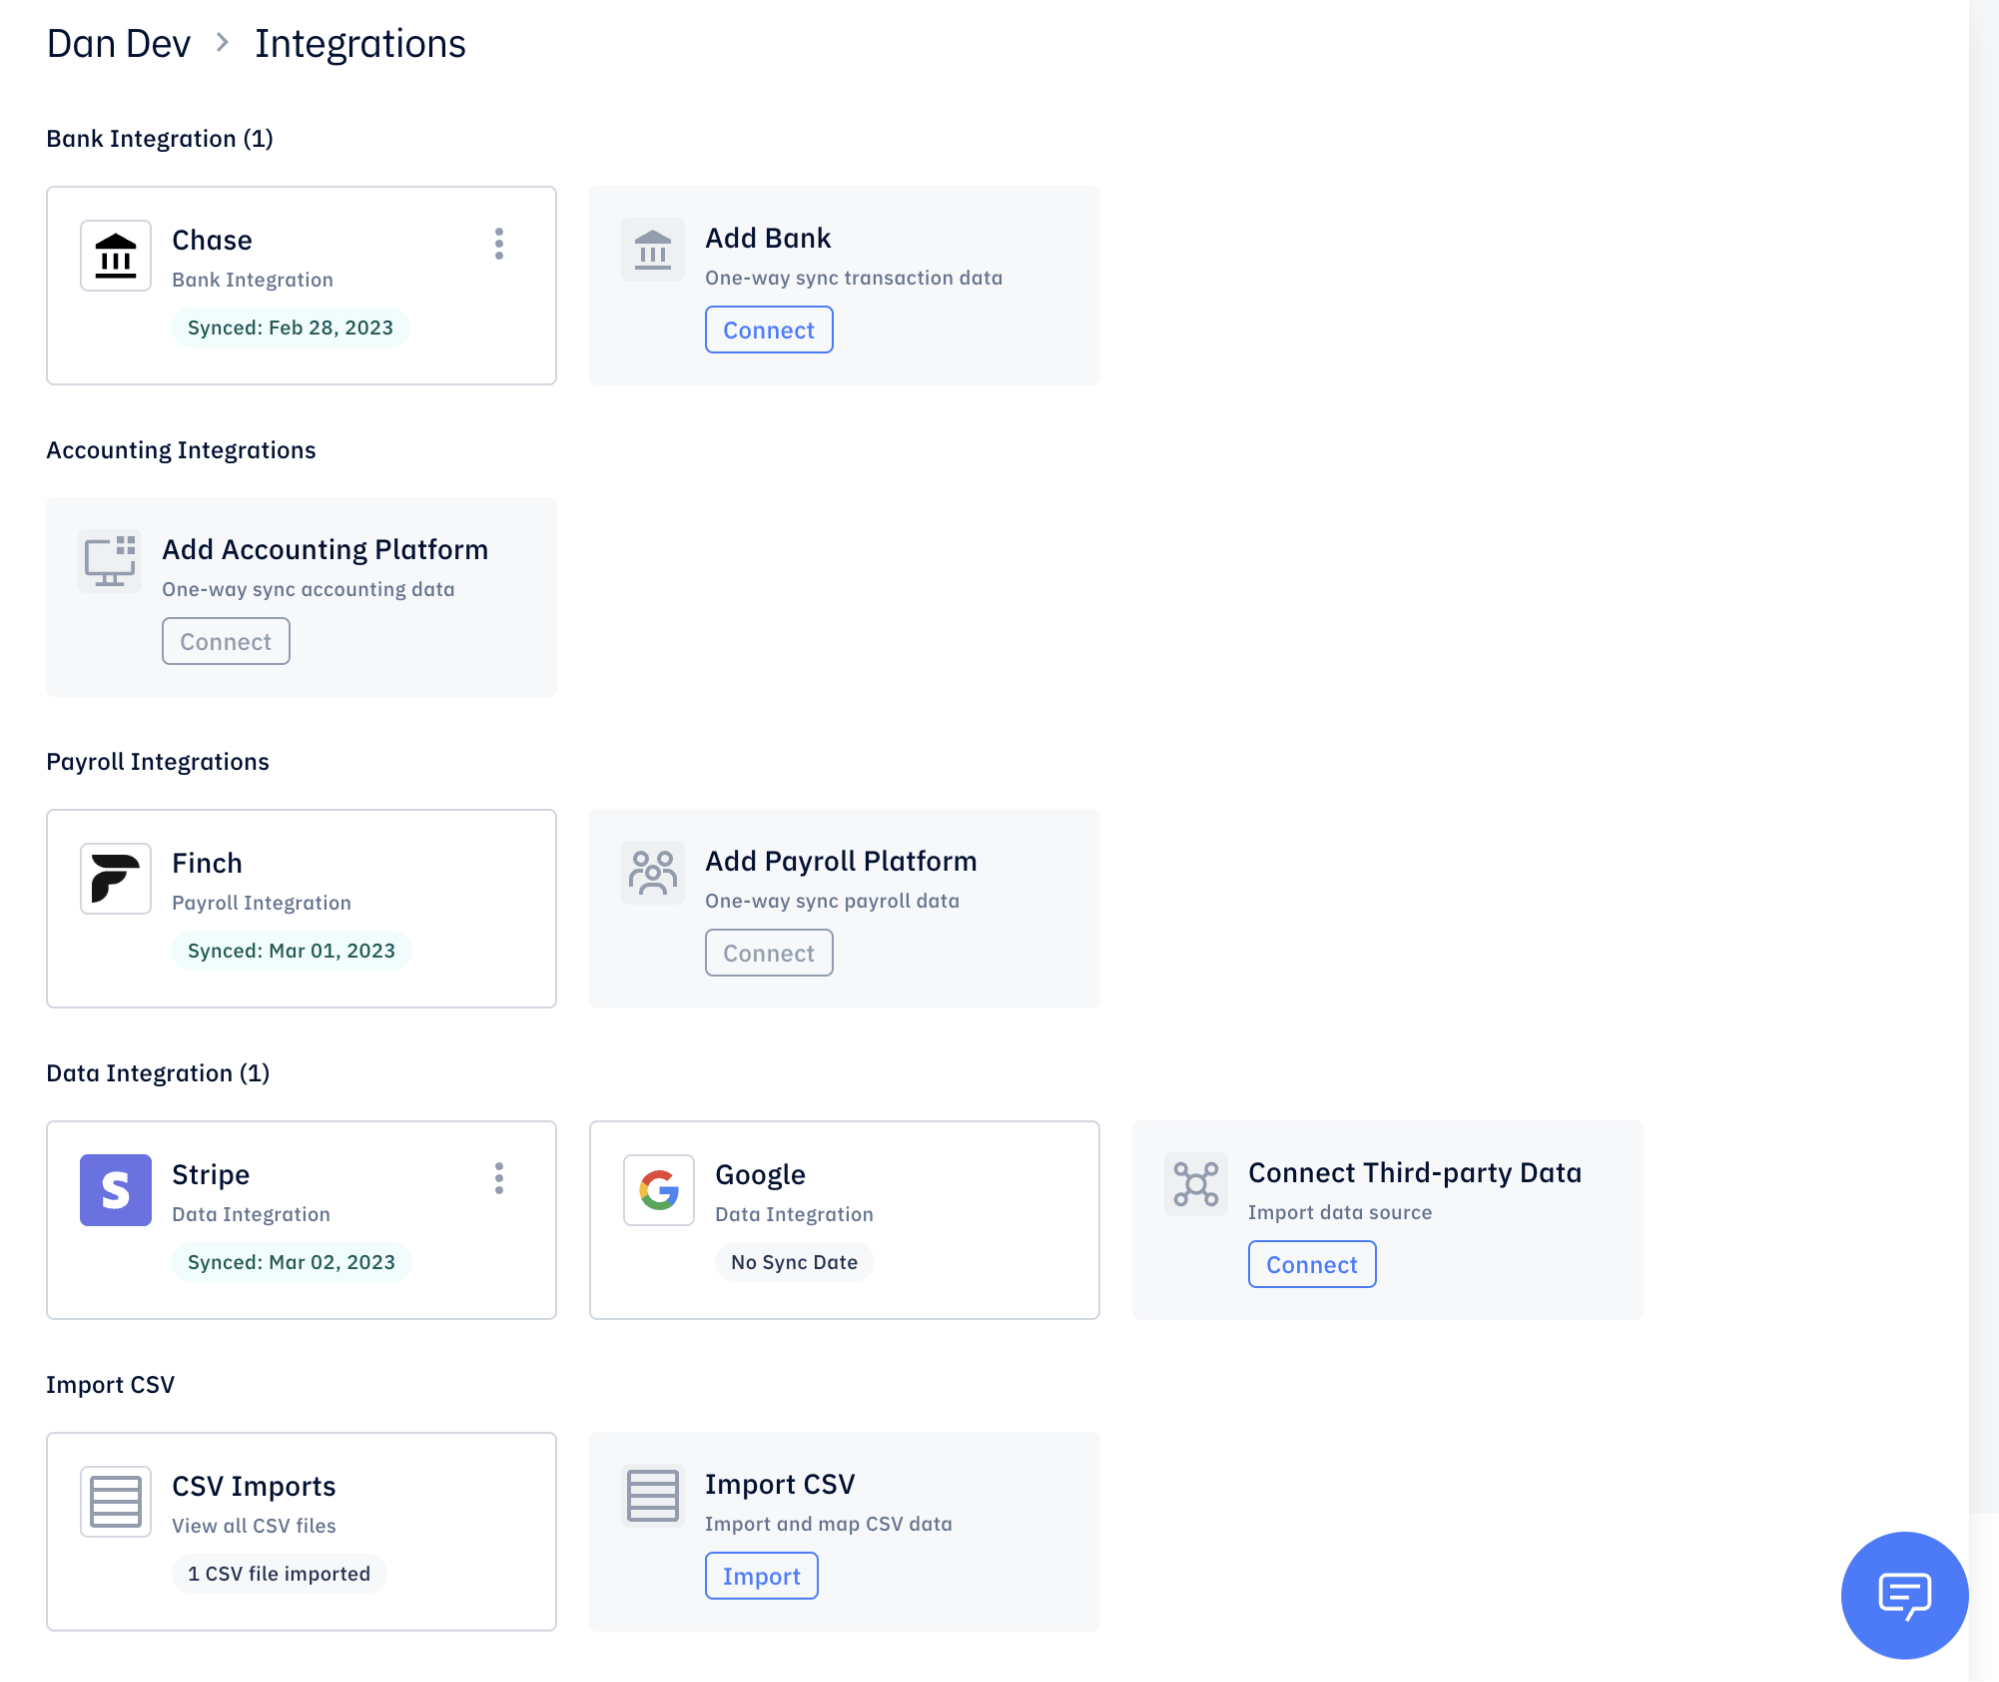
You can manage your integrations with your bank, accounting ERPs, payroll, Stripe, Google, and CSV imports in the Integrations home page in your Settings page.
Features
Bank integration
Banks can be added by clicking Connect on the Add Bank card. This will take you through a Plaid workflow that walks you through connecting your bank account.
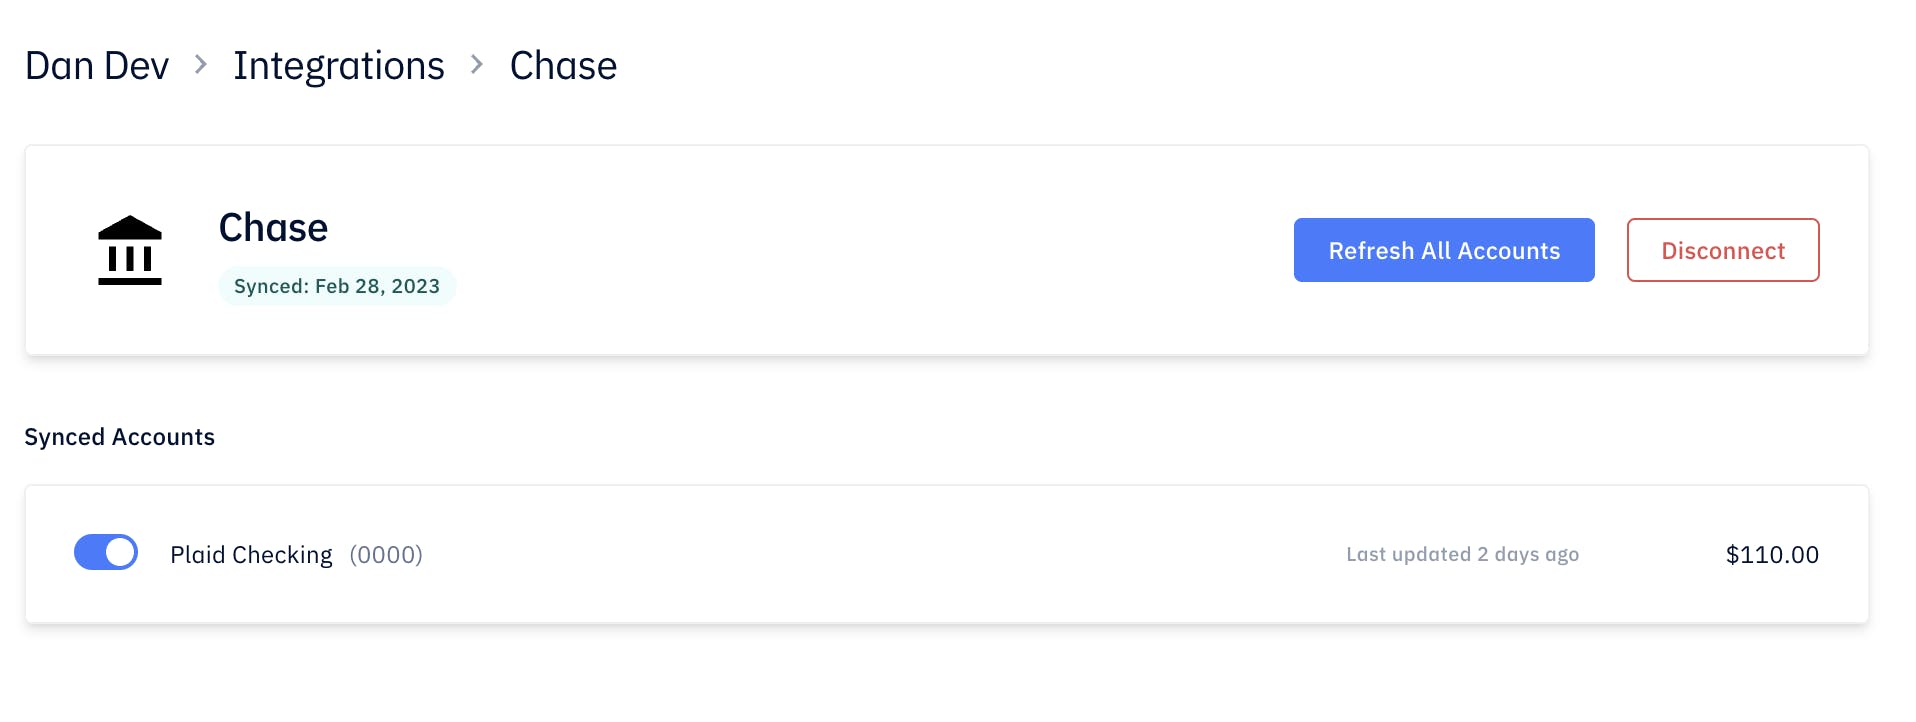
Once connected, you can click into your bank card to view your synced accounts, re-sync accounts, and remove the integration.
QuickBooks Online and Xero integration
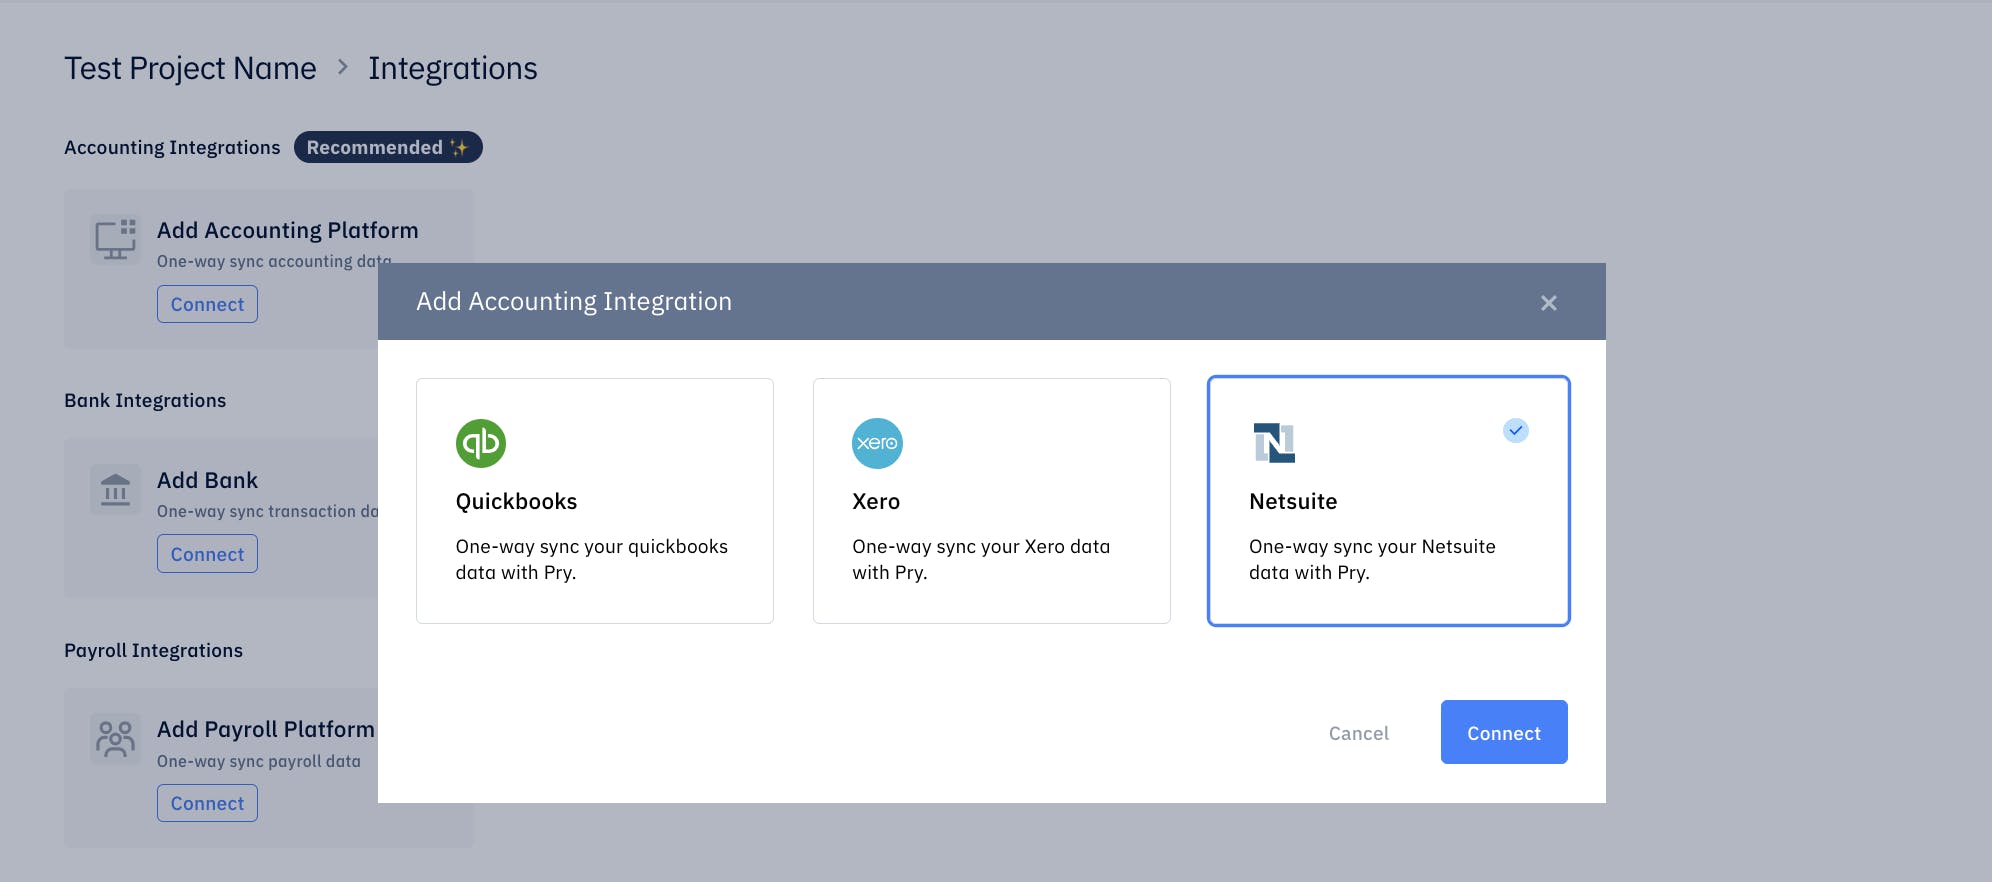
If you don’t already have a bank account integrated, you can connect to QuickBooks Online or Xero by clicking Connect on the Add Accounting Platform card. This will take you through the sign in flow.
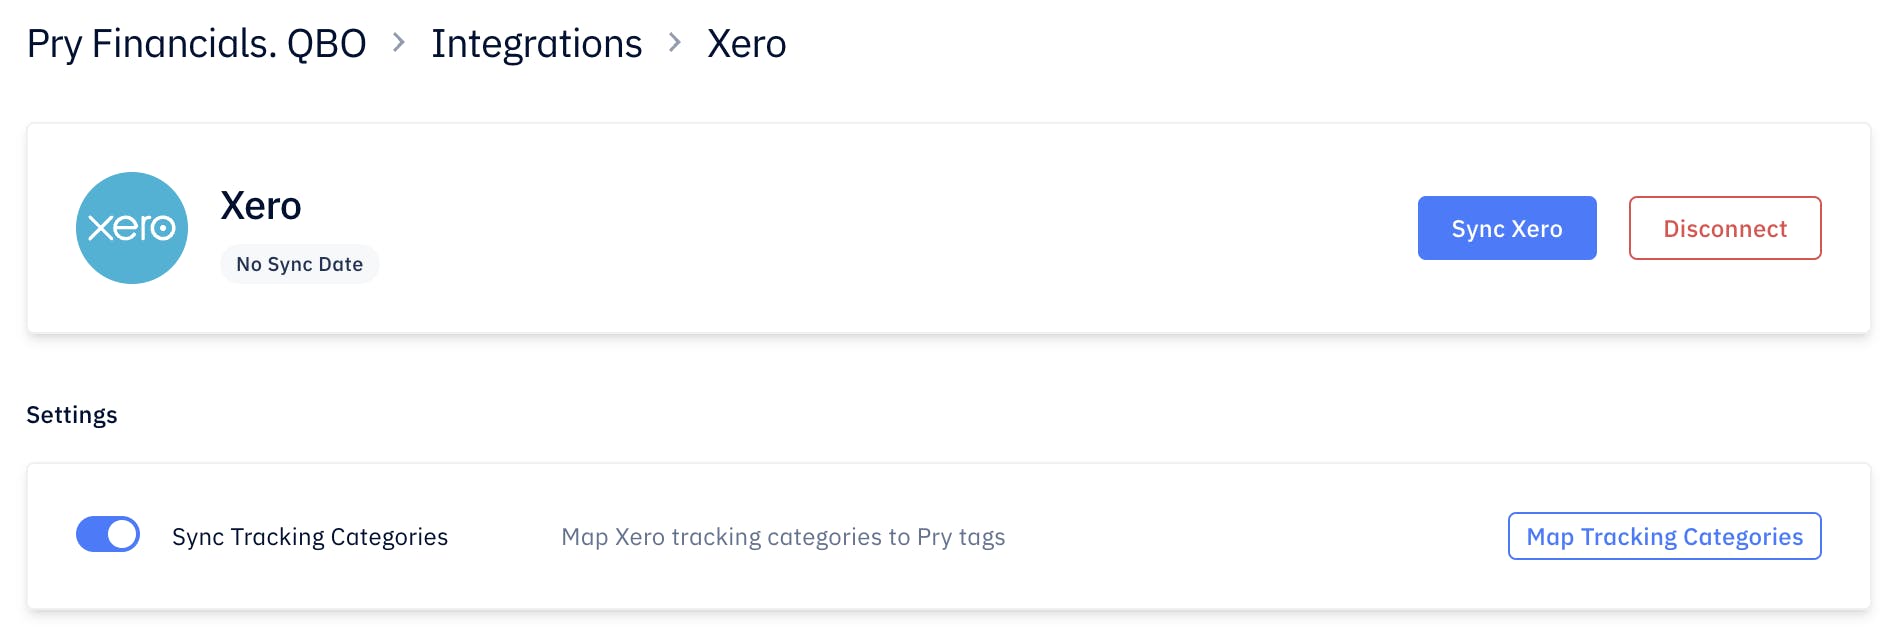
Once connected, you can sync and disconnect these integrations at any time, and customize your integration by syncing classes (QuickBooks Online) or managing tracking categories (Xero).
NetSuite integration
If you use NetSuite as your ERP, you can link it to your Pry account instead of integrating a bank account. You can sync NetSuite when you first go through the setup flow for your new Pry workspace, or at any time after that by clicking Connect on the Add Accounting Platform card. Note that you’ll be asked to authenticate your NetSuite account during the connection process.
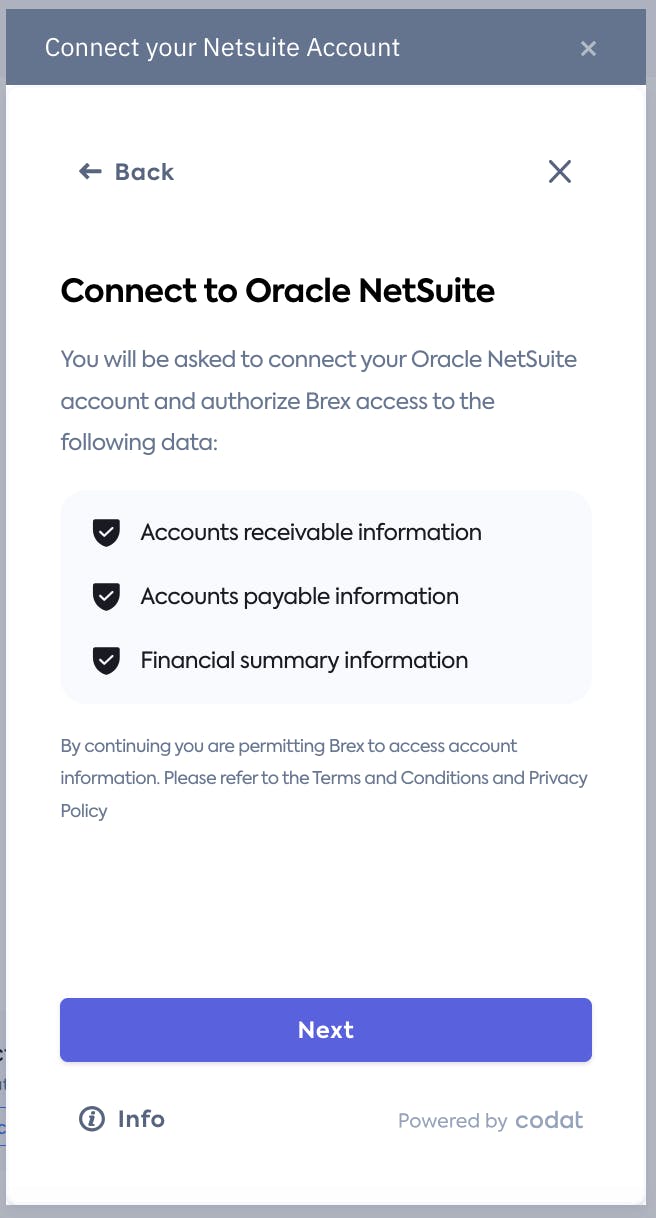
After you first set up the NetSuite integration, we’ll start pulling relevant ERP data from NetSuite and that you can map to P&L categories. We’ll continue using your NetSuite connection to update your Pry workspace with ‘Actuals’ taken from your NetSuite journal entries.
Admins can find your established connection on the Integrations page, where you can also reconnect or disconnect the integration at any time.
Payroll integration
Clicking Connect on the Add Payroll Platform card will bring up a modal that lets you choose from a variety of different payroll providers. After you made your selection, you will be routed through that provider’s sign in flow.
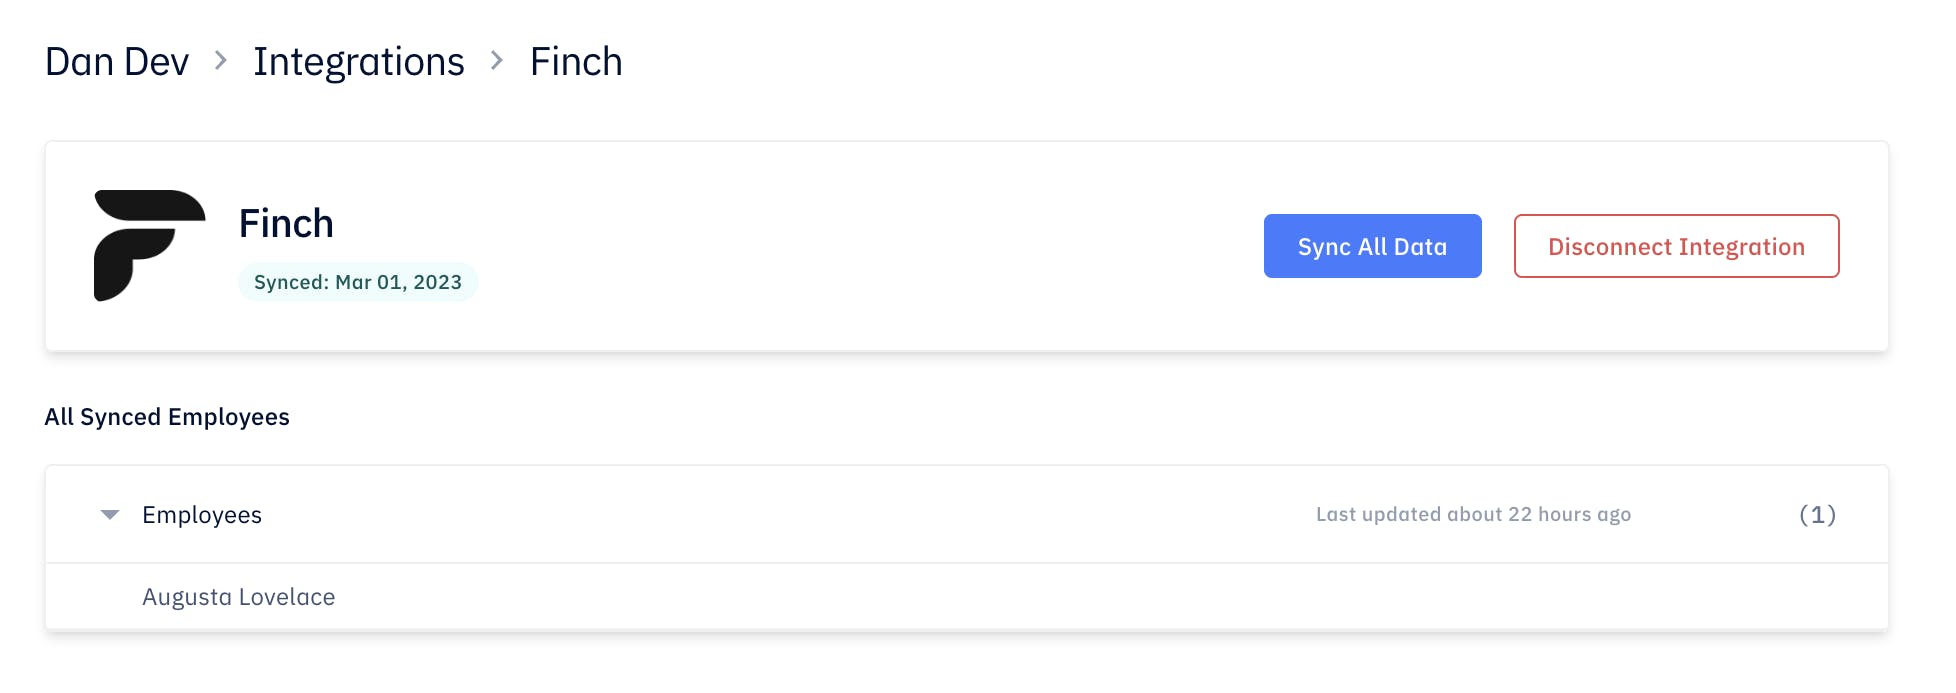
Once linked, you will see your connected payroll on the Integrations home page that you can click to be directed to a page where you will see a list of your employees and contractors. From here, you’ll have the ability to sync your data, or, if you choose to disconnect your integration, to remove all imported employees.
Stripe integration
You can add a Stripe data integration by clicking Connect on the Connect Third-Party Data card to go through your Stripe account’s sign in flow.
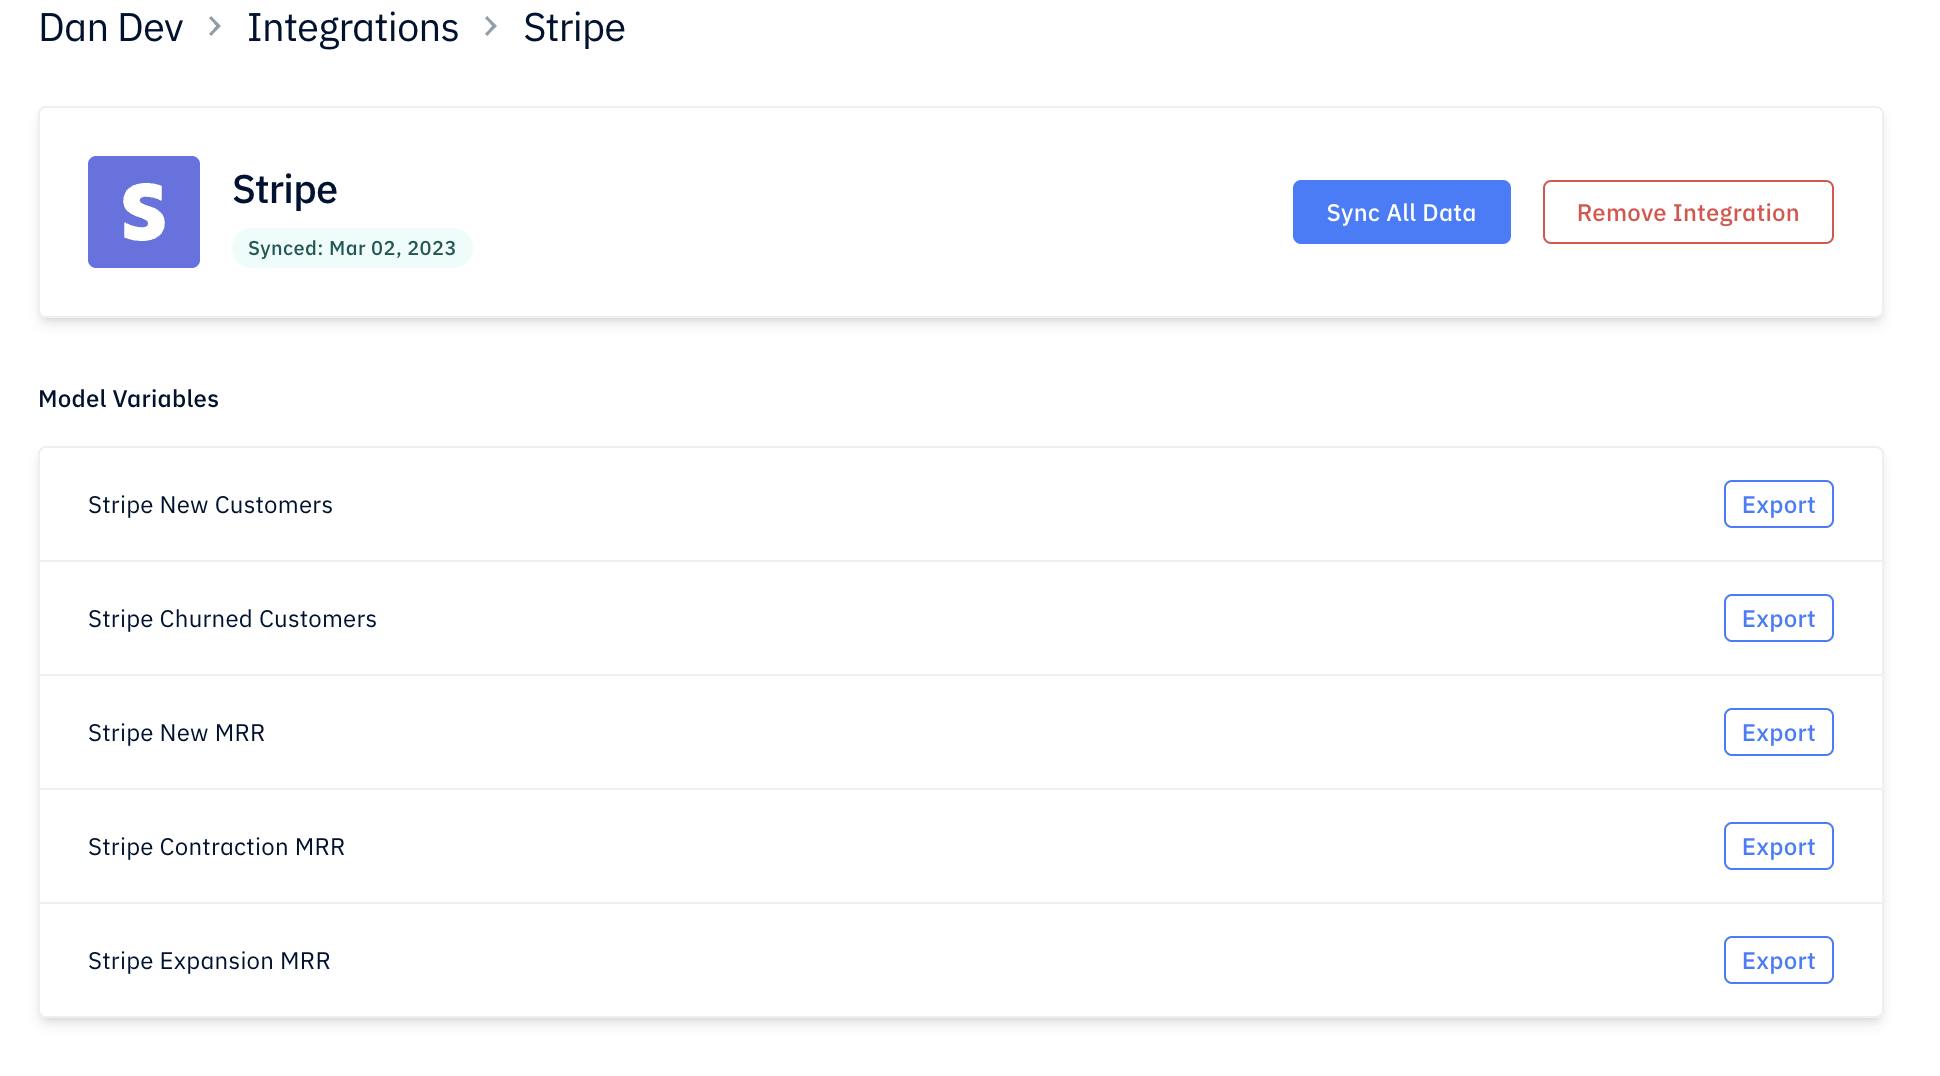
Once synced, your Stripe connection will appear on the Integrations home page. Clicking it will direct you to a page where you have the option to export model variables, as well as the ability to sync and remove data.
Google integration
The Google Integration is always visible on the Integrations home page and displays both connected sheets and exported sheets.
Connected sheets are Google spreadsheets that you uploaded as an “Import” Input in the Models page. Each input that is an imported Google sheet will be listed under the “Connected Sheets” section. You can choose to sync the connected sheets when you have updated data in the Google sheet. You can also open or delete each sheet.
Deleting a connected sheet will transform all connected inputs into lists, using their most current data. They will no longer sync when the connected sheet is updated.
The “Exported Sheets” section lists any sheets that have been exported from Pry and saved in the current user’s Google Drive. To see these, you can log into Google on Pry and grant Pry permission to view your Google Drive. Pry does not store this data, so it can only be viewed if your Google account granted permission.
When signed in to Google on Pry, you can switch accounts, sign out, or disconnect your Google account. Disconnecting removes all permissions granted to the Pry app, which would have to be re-granted if you need them again in the future (for example, if you want to export data to Google sheets).
CSV import integration
You can import a CSV by clicking Import CSV to be routed through the import flow.
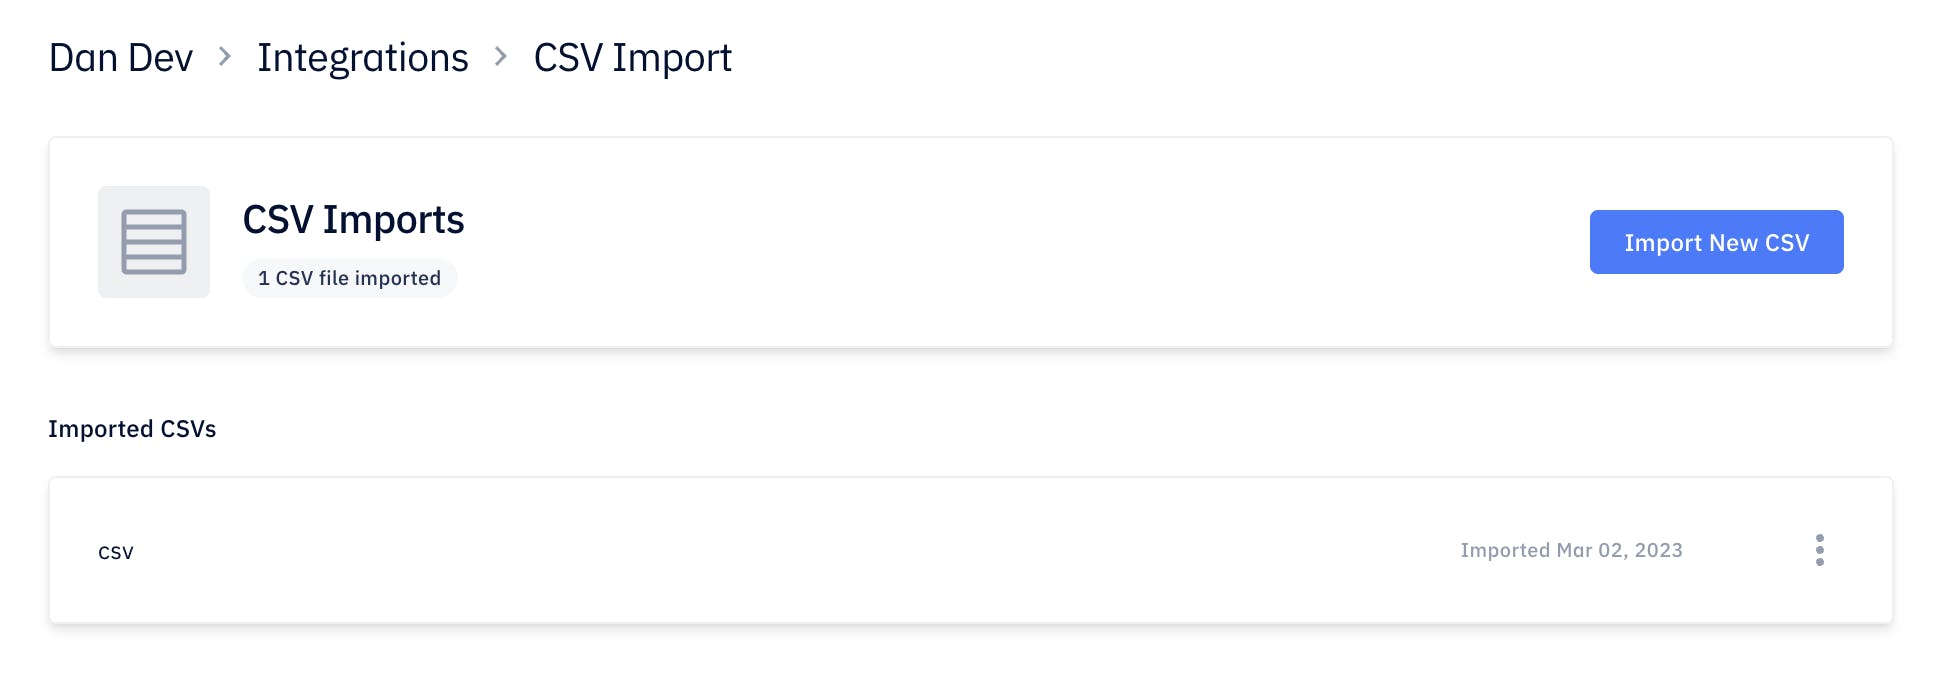
Any time you import a CSV, you can see it listed alongside all your previously imported CSVs by clicking on the CSV card on the Integrations home page. From the CSV Imports page, you can import a new CSV or delete entries of existing imported CSVs.