Custom Reports
Overview
This guide will teach you how to create custom financial and headcount reports in Pry. For example, during fundraising and board presentations, you may want only to report the few critical items that your investors care about. That is when you can use Pry to create such custom financial reports. And when you have ambitious expansion plans and need your department leaders to help manage the hiring, you can create custom hiring plan reports giving them limited access to their perspective departmental headcount information.
Financial Plan Reports
You can create financial reports such as Profit & Loss, Balance Sheet, Cashflow Report, Expense by Department, etc. from Pry's report templates to share with your internal teams and/or external parties.
Creating A Custom Report From Report Templates
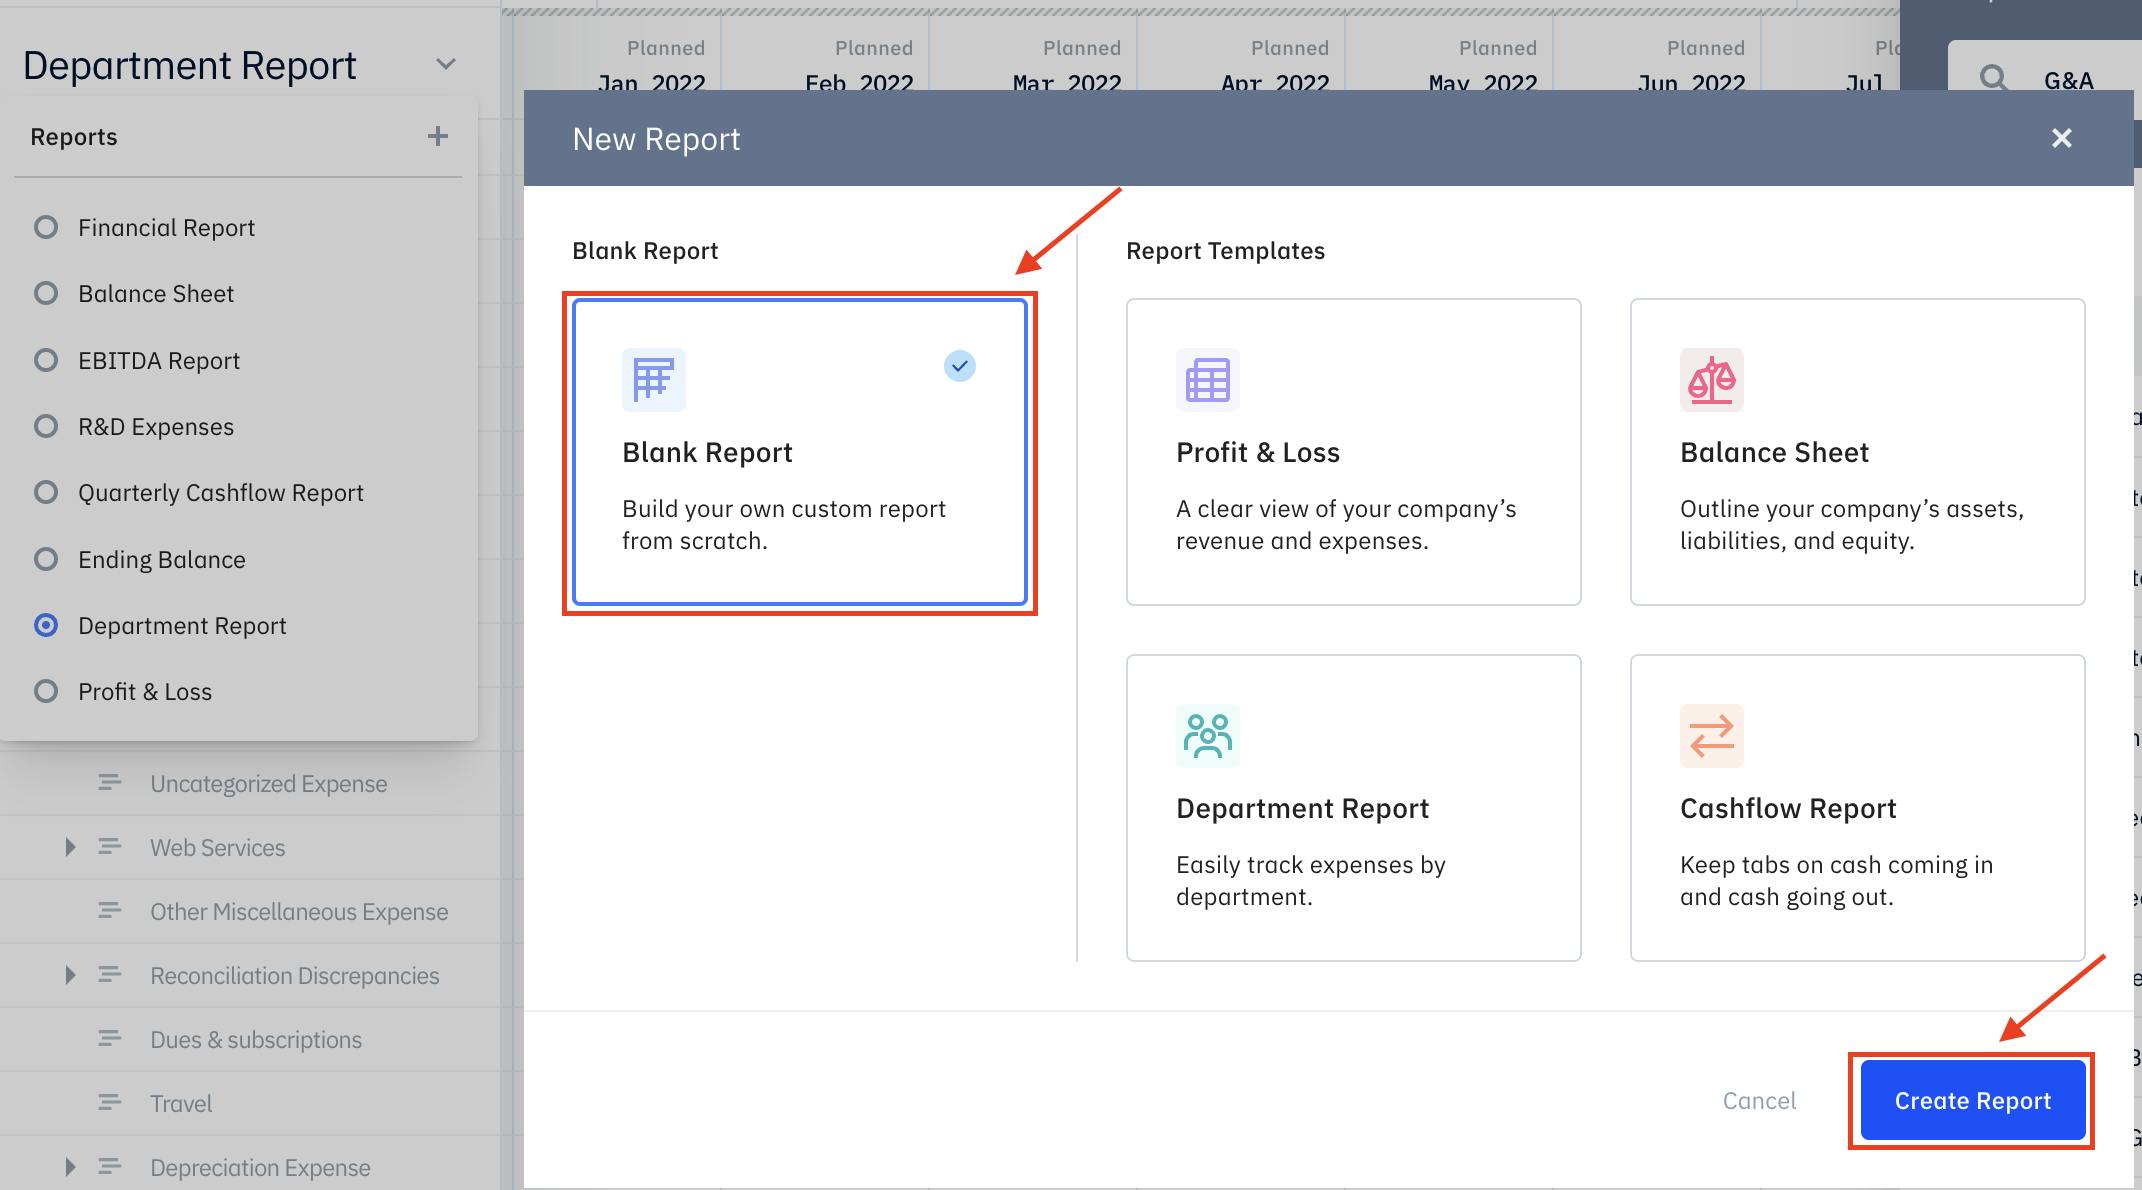
Currently, Pry has the four most commonly used financial reporting templates for internal reviews and investor meetings - Profit & Loss, Balance Sheet, Department Report, and Cashflow Report.
To create a custom report from one of these templates, go to the "Financial Report" page (by clicking on "Financials" on the top right corner of Pry's site) and scroll down to the table where it says "Financial Report" under the charts. Click on the down arrow next to "Financial Report" and then the "+" sign.
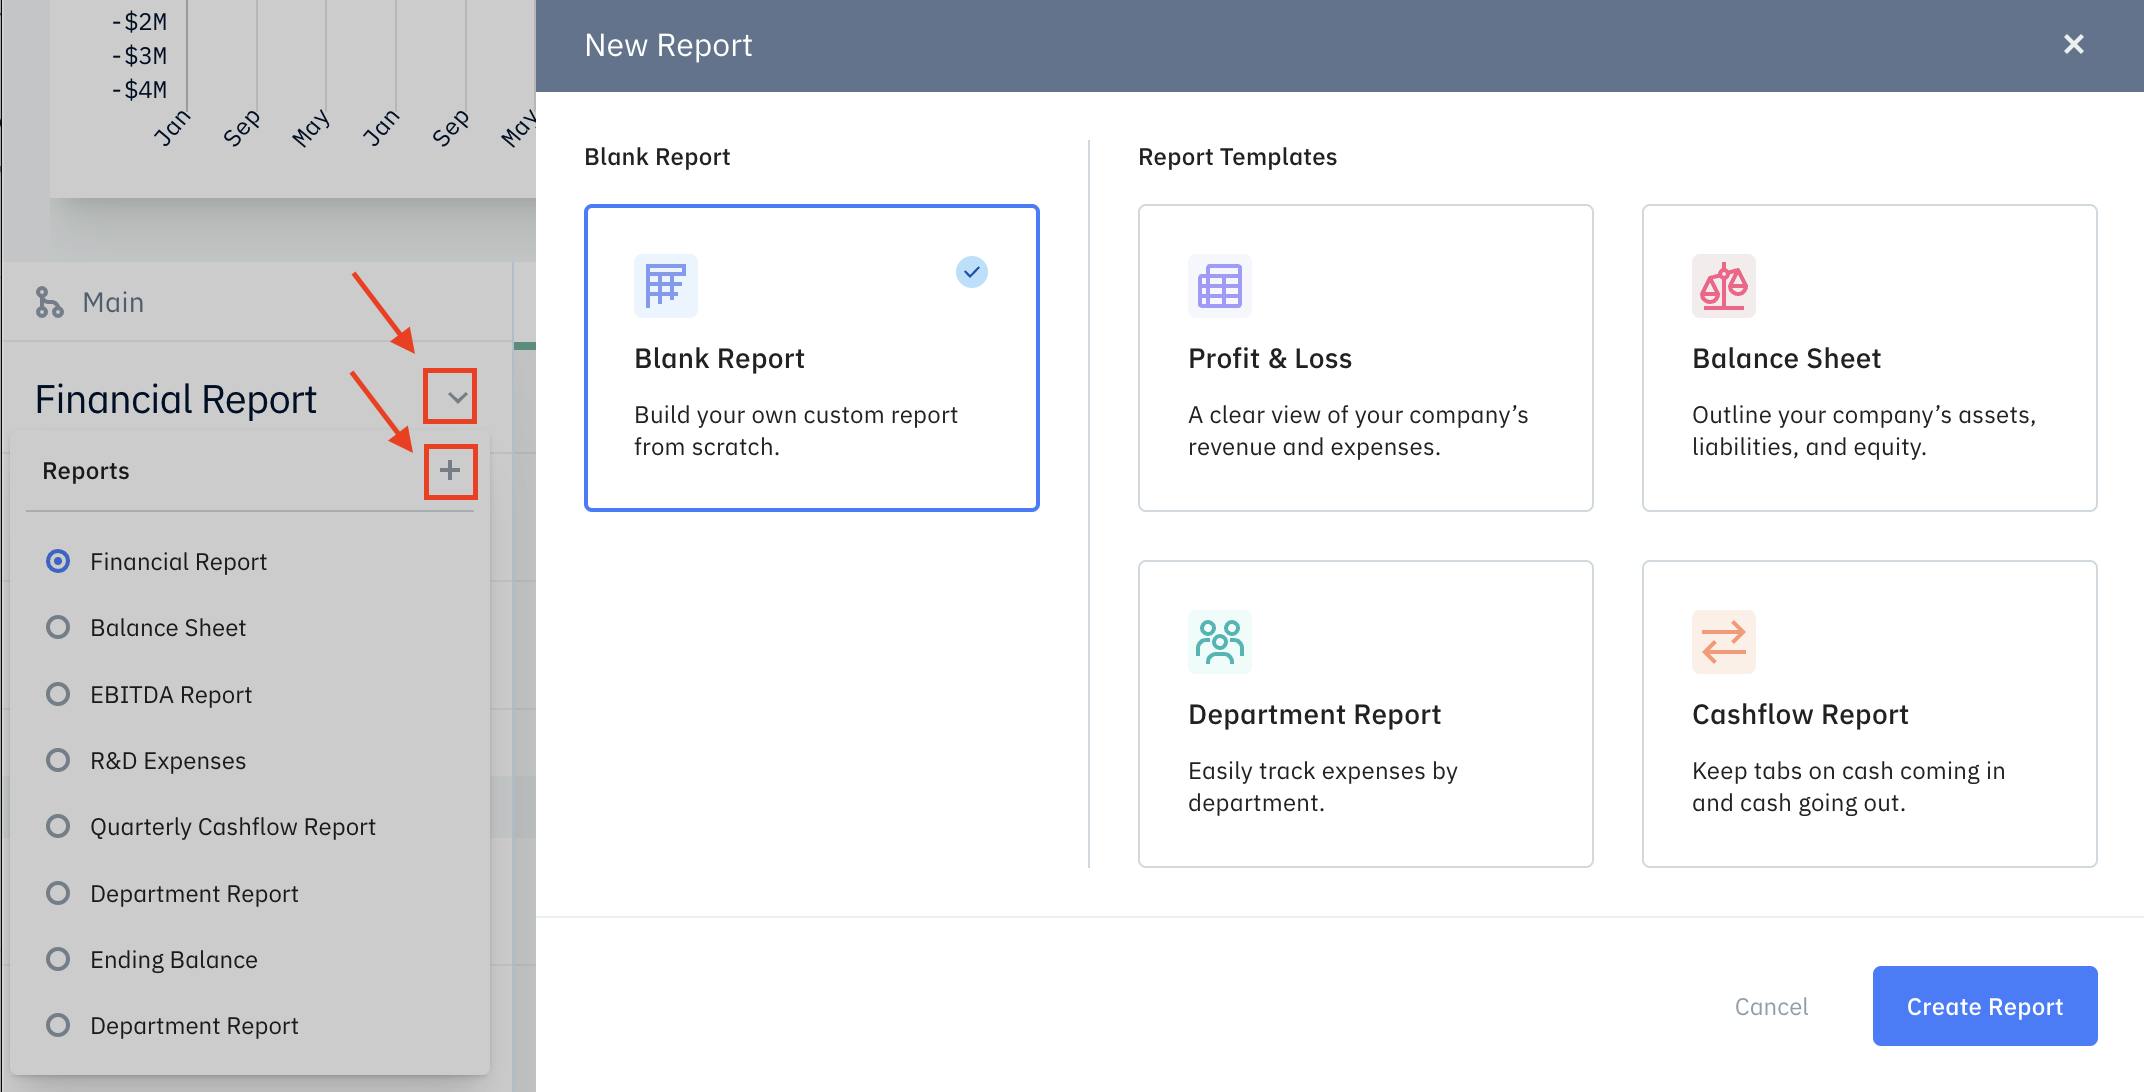
You will see a pop-up window - "New Report". Click on one of the four available templates and then "Create Report". A report will be generated based on the template you choose and its name will default to the template's name. The name of the report is automatically highlighted for you to change. After you rename the report hit enter.
TipThe "Cashflow Report" in our templates is not your traditional Statement of Cashflow. It is a view using the indirect method reconciling month-over-month changes in balance sheet accounts with cash impacts. The change in cashflow should match that of the traditional Statement of Cashflow (using direct method).
Hide/Unhide an Account
You can then hide an account by hovering over the account's name and clicking on the eye icon when it appears.
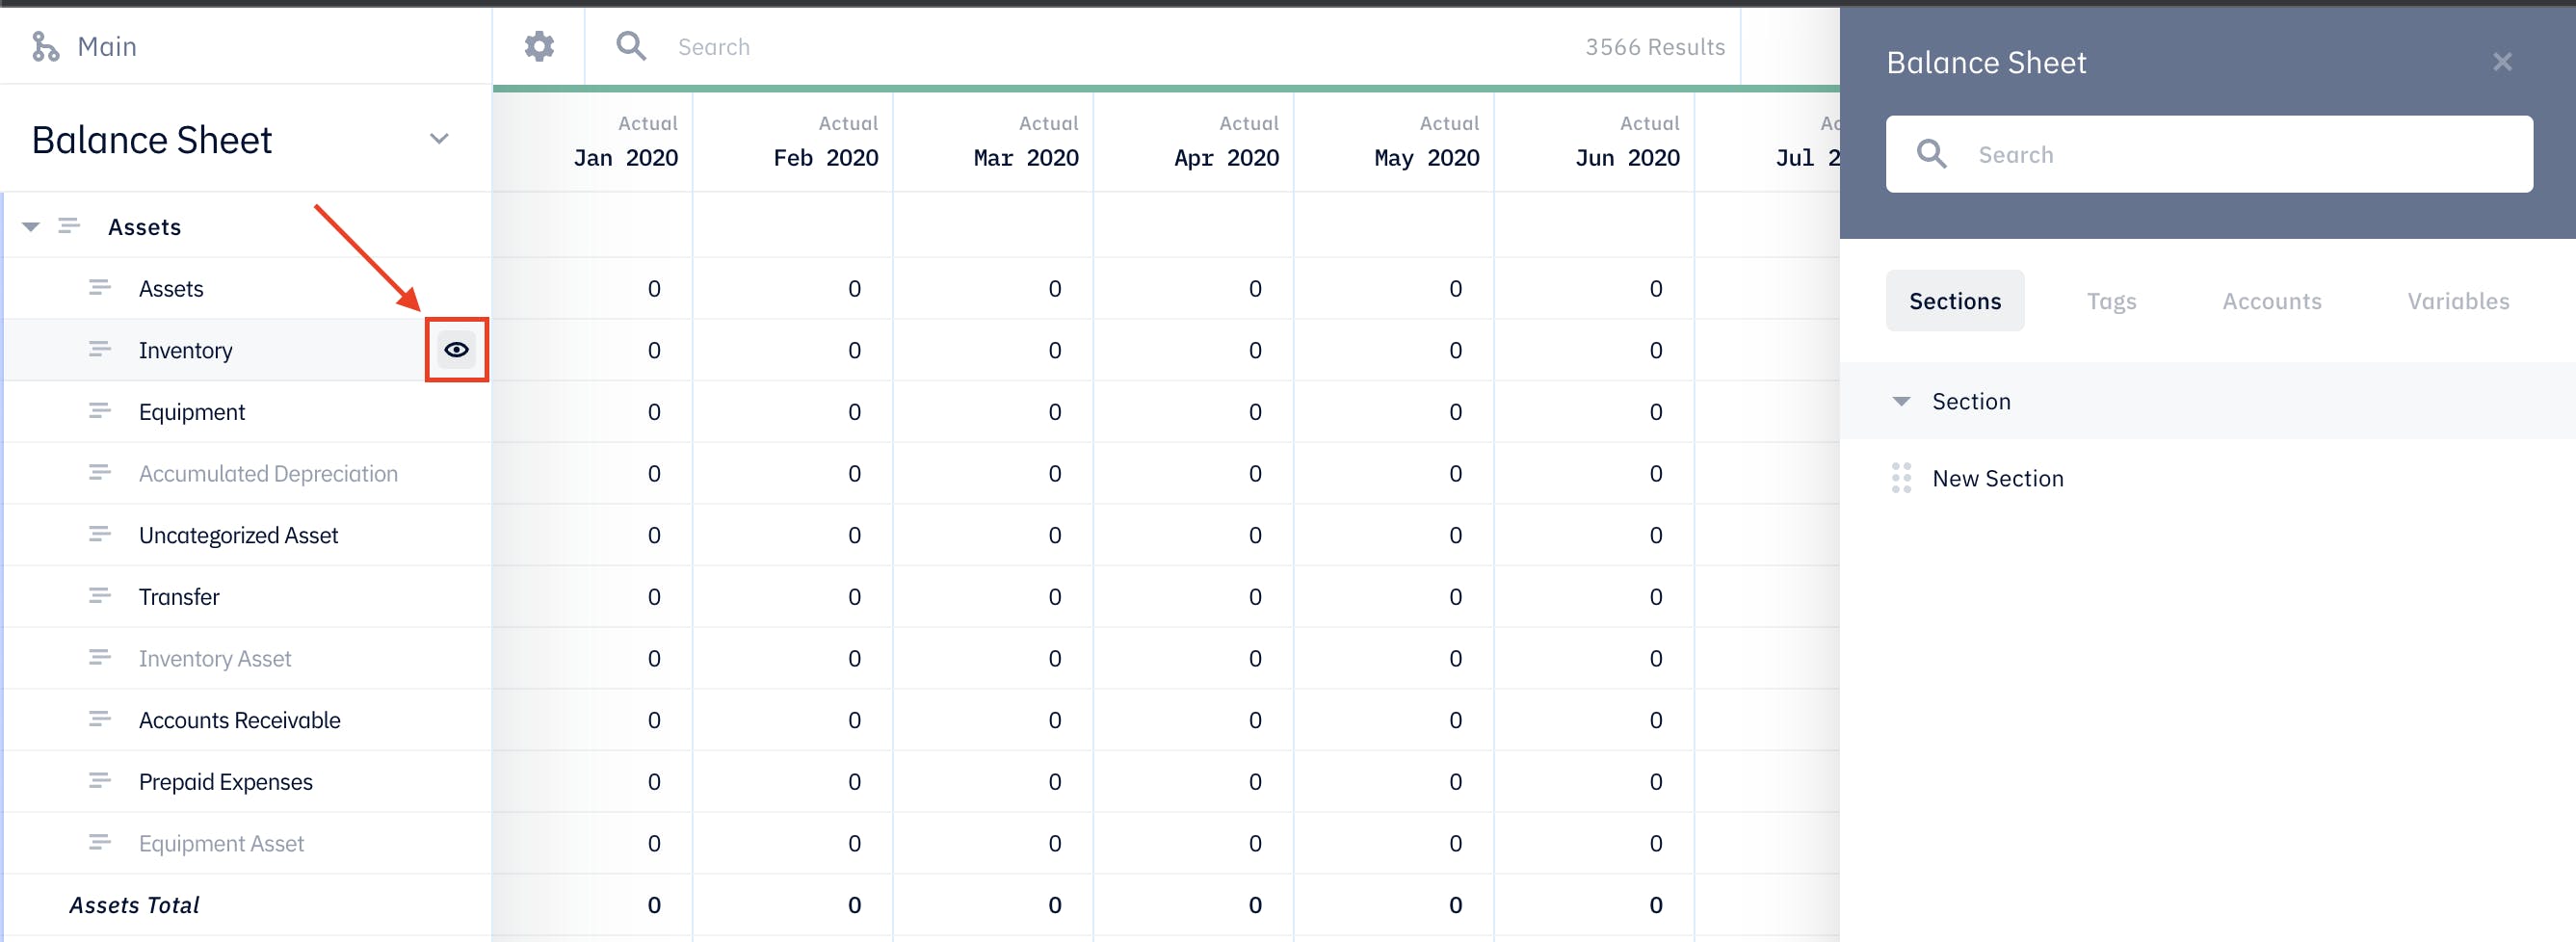
The hidden account will be excluded from the total for the corresponding higher-level accounts. So, for example, in the picture above, if we hide the sub-account "Inventory" under "Assets", then the "Assets Total" balance will not include the balance of "Inventory".
Add Sections to Report
If you would like to break down your custom report by sections, you can add "Sections" to the report. To add a new section, click on "Sections" on the utility bar on the right-hand side, drag "New Section" (by the six dots), and drop it in the accounts column on the left-hand side of the page.

After adding the section, you can rename the section by hovering over the section, clicking on the three horizontal dots, selecting "Rename", typing in the new name, and hitting enter.

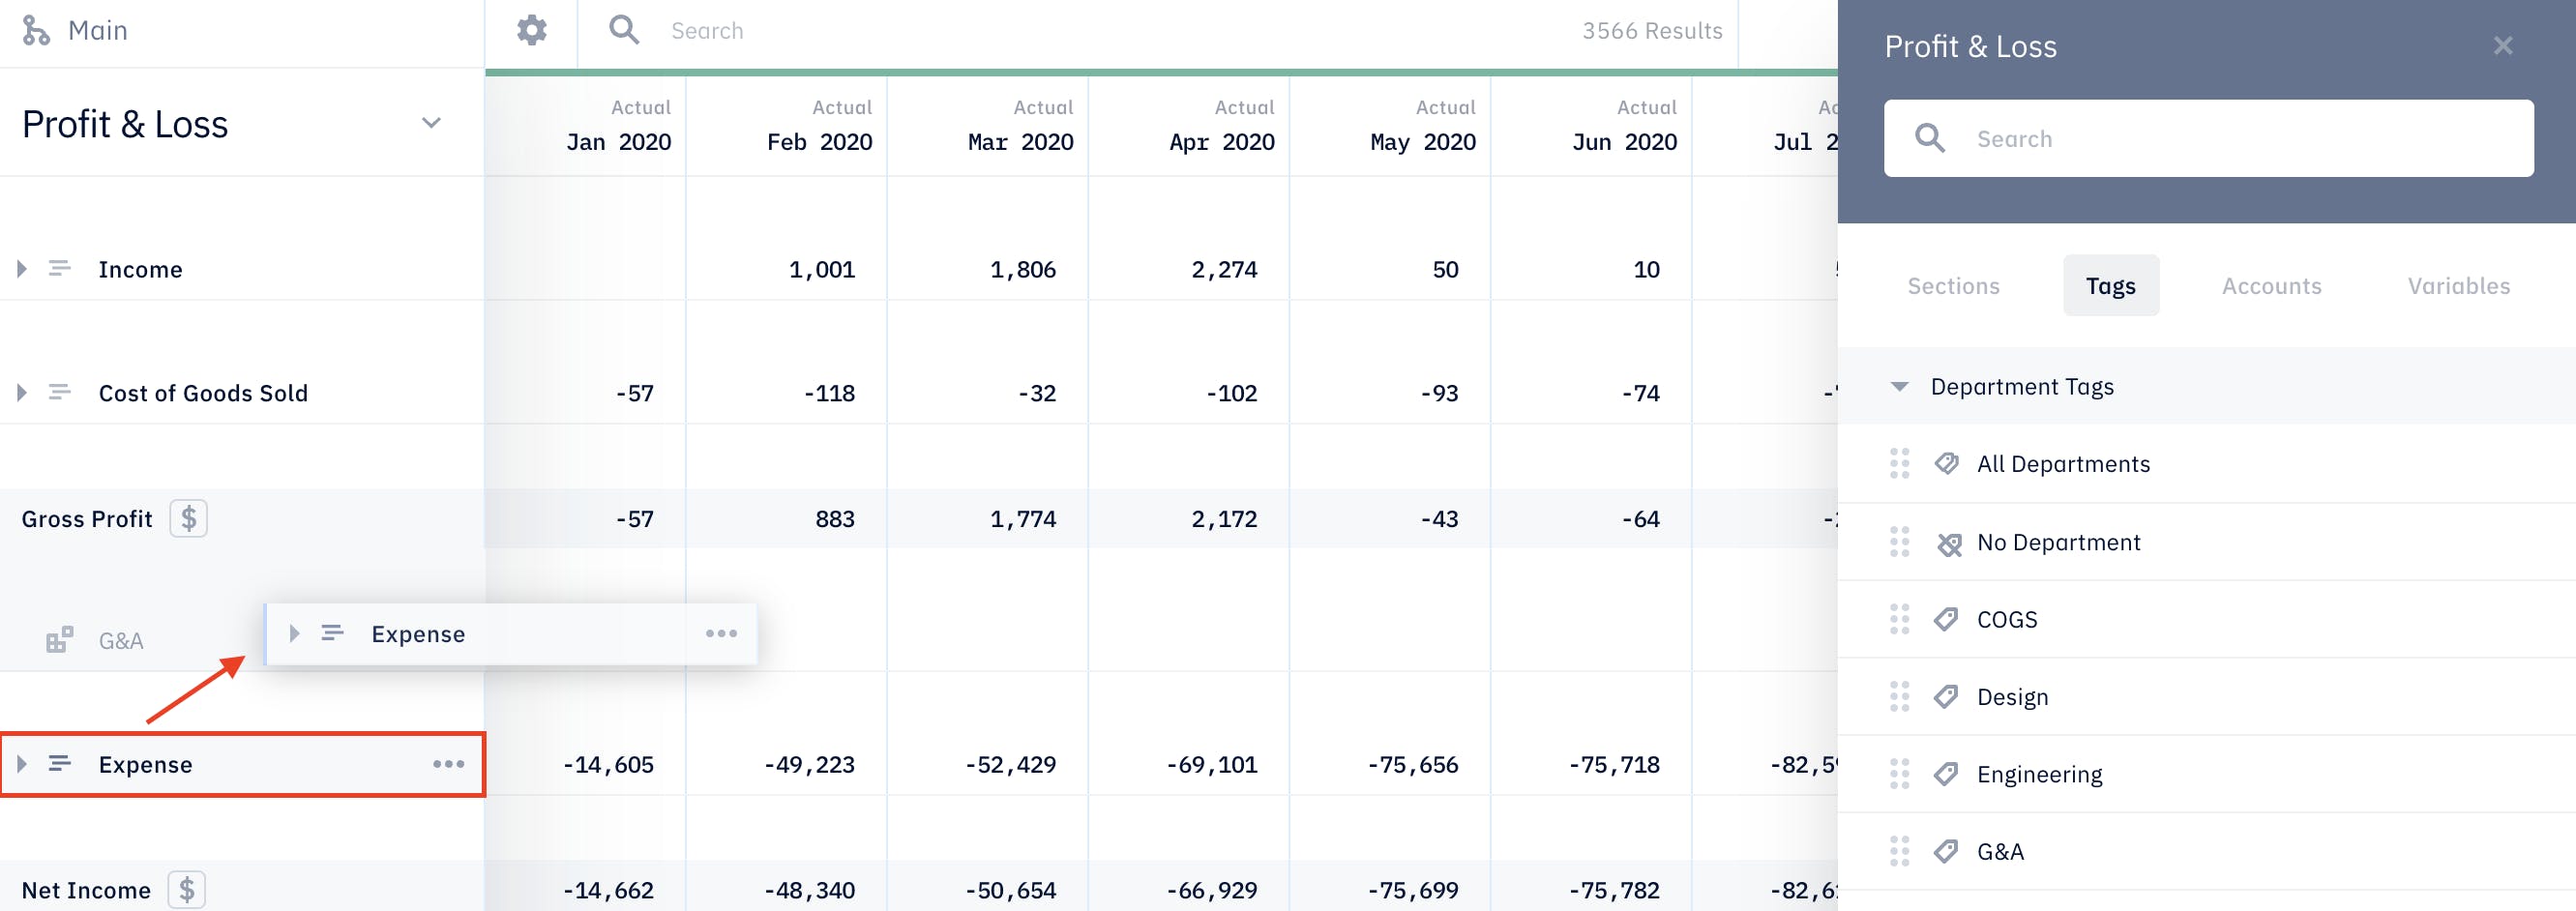
Filter Report with Tags
You can filter the report by tags when you want to make a custom report for a specific department, location, or project. To create a filter with a tag, click on "Tags" on the utility bar on the right-hand side and find the tag that you would like to use for the filter. Then, drag the tag (by the six dots next to the tag name) to where the accounts column is and drop it above the account where you want the filter applied.
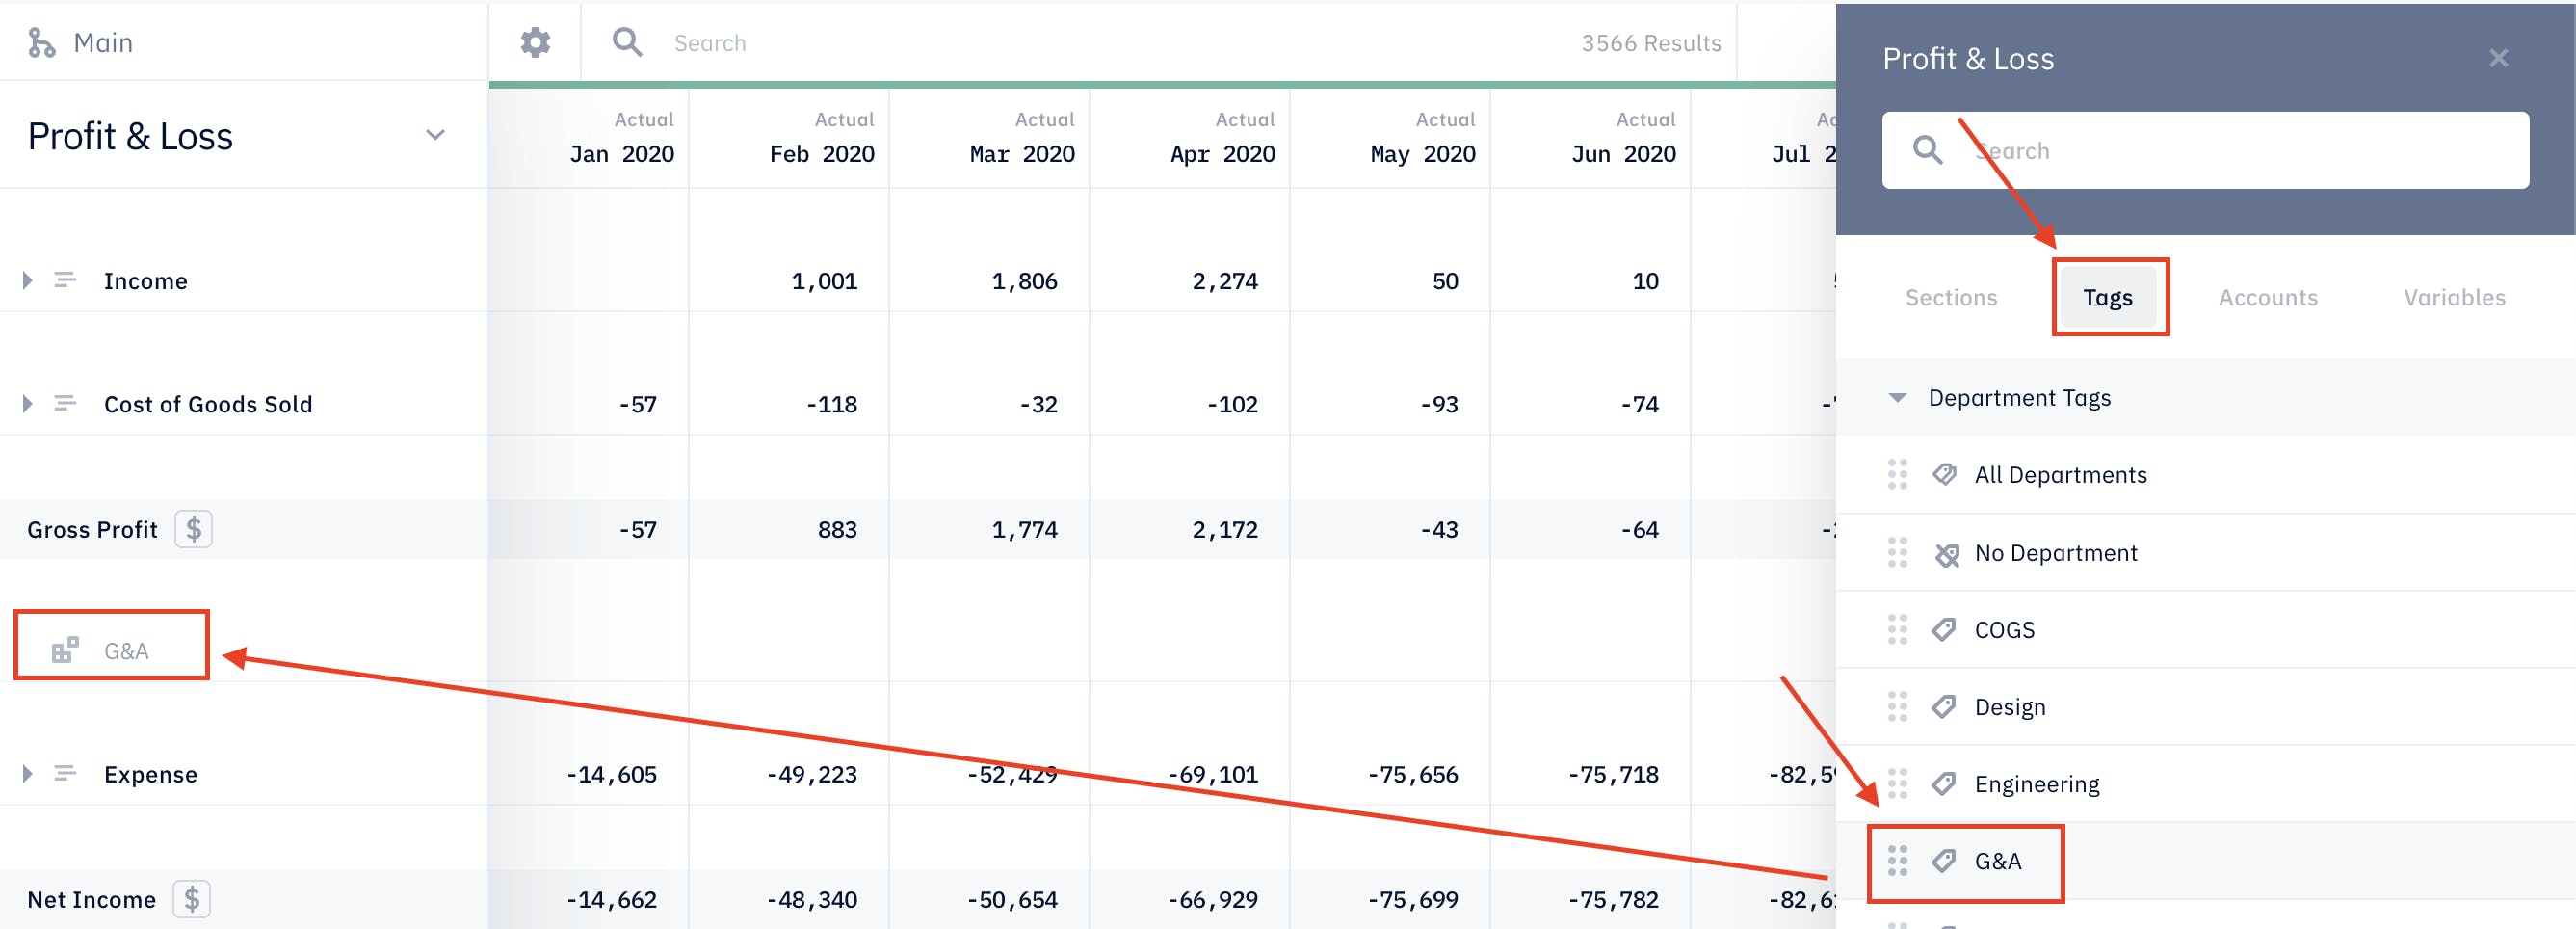
Then, drag the account you want to apply the filter to (by the three uneven lines next to the account name) and drop it on top of the tag you just moved.
Lastly, repeat these steps for all the accounts on this report.
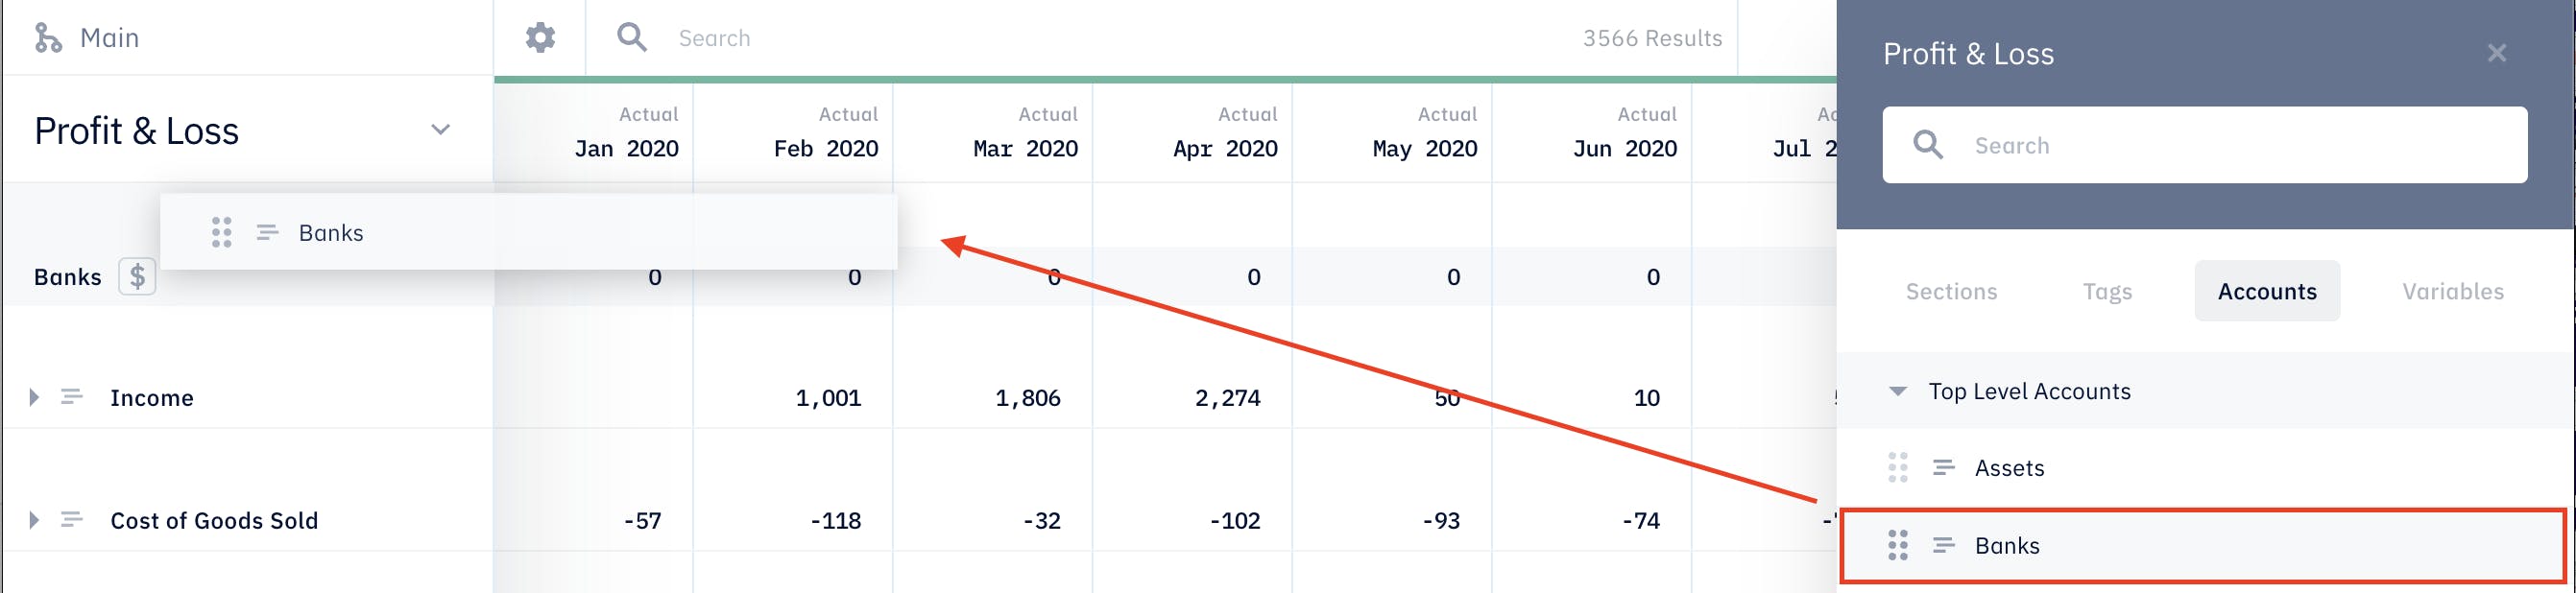
Add Accounts to Report
You can bring accounts from different templates to your custom report. For example, to add your bank balances to your Profit & Loss report, you can find the account "Banks" under "Accounts" on the utility bar on the right-hand side and drag "Banks" over to the accounts column.
Add Calculations to Report
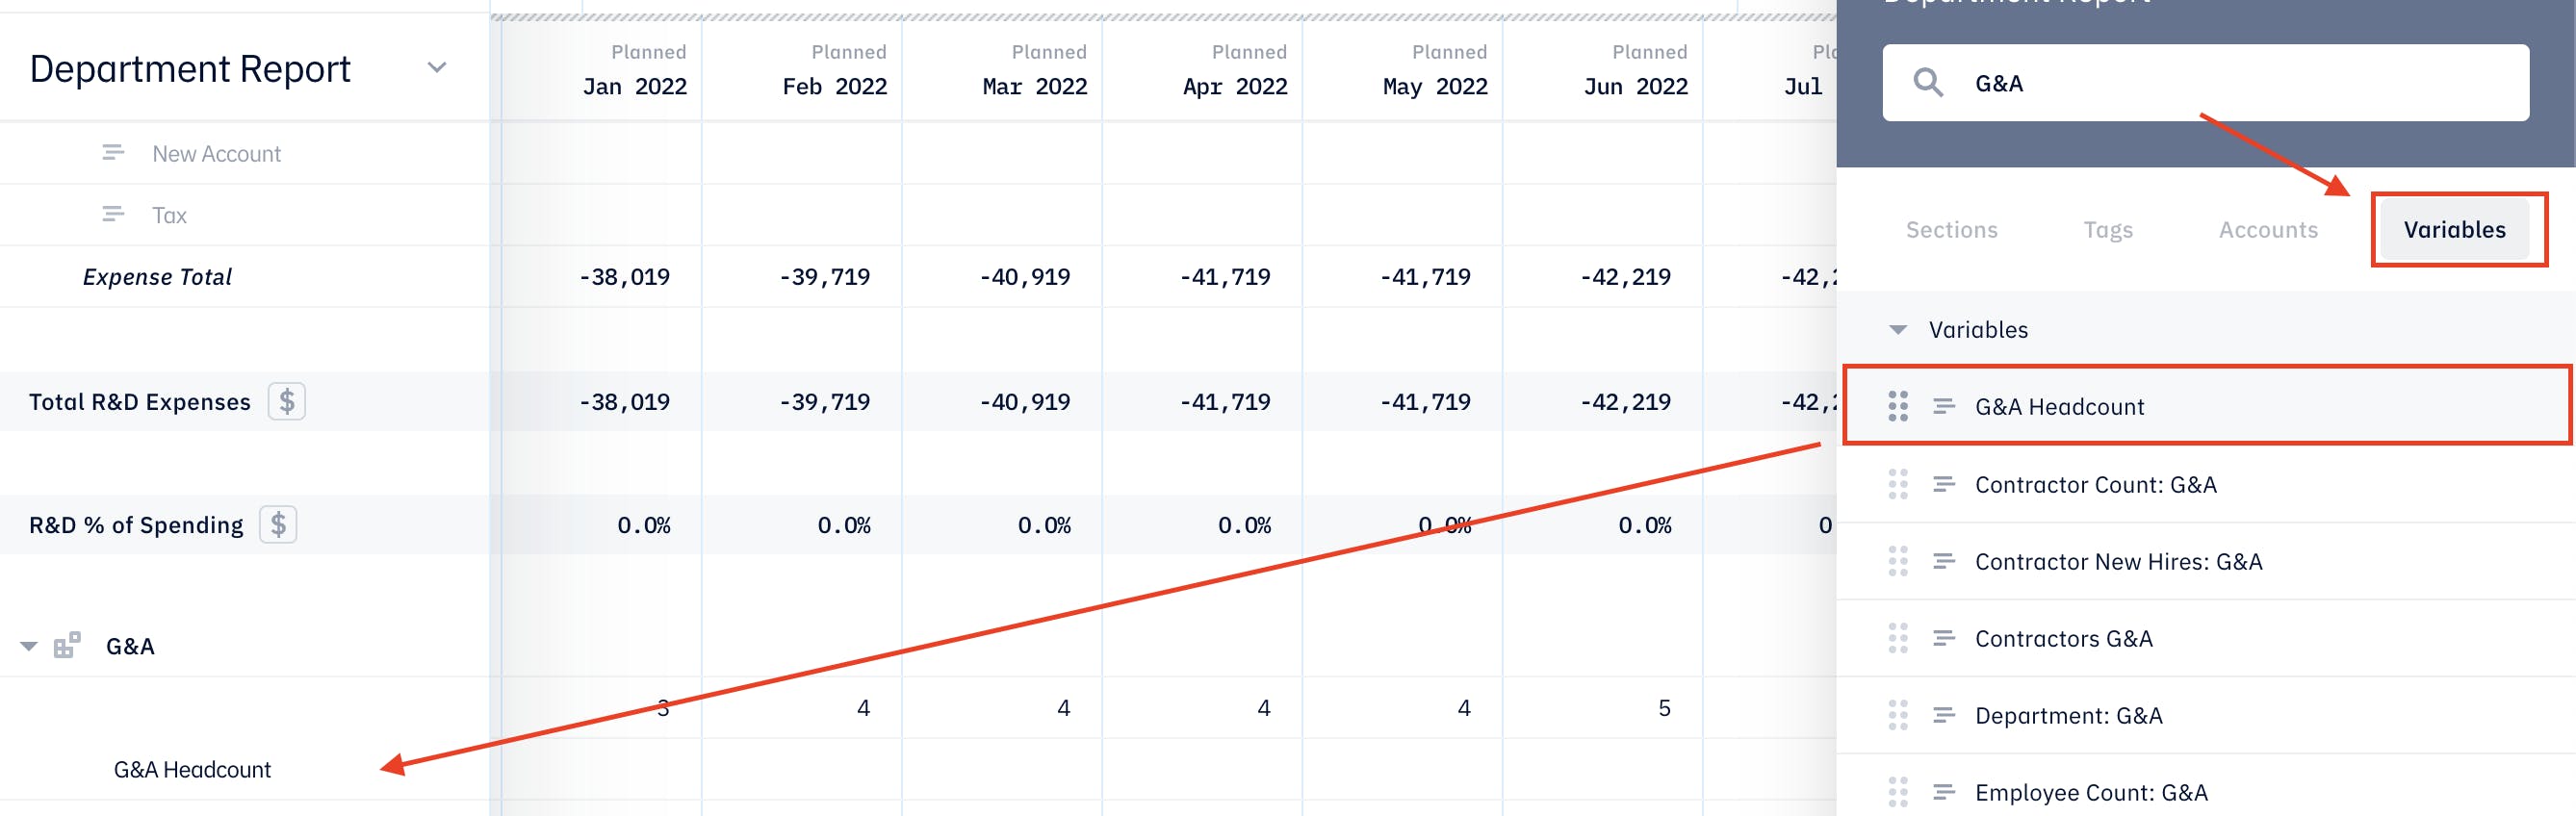
To provide context for the financial numbers on your report, you might want to add a few non-financial metrics to your custom report. Say, on the department expense report, having employee headcount by the department on the report will help the reviewers understand why payroll expenses vary significantly from one department to another.
This example will add "G&A Headcount" to the department report under "G&A", which calculates the monthly total of employee and contractor counts for the G&A department.
Assume you already have "G&A Headcount" calculated in one of your models. On the "Department Report" where you want to add this calculation, find this calculation under "Variables" on the utility bar on the left-hand side of the page, drag it over to the account column, and drop it under "G&A".
Some ideas for calculations on reports are departmental expenses as % of income (or revenue) on department report, customer count on Profit & Loss report, month-over-month % and year-over-year % changes on Profit & Loss report, etc.
Creating A Report From Scratch
Now you have learned how to add sections, tags, accounts, and calculations to a report template. You can apply the same steps to create a report from scratch. This time, instead of selecting a report template, select "Blank Report" on the left-hand side of the "New Report" pop-up window and click on "Create Report".
Now, you can drag in new sections, tags, accounts, and calculations from the utility bar on the right-hand side of the page to the left-hand side column where the accounts will be.
Hiring Plan Reports
You can create customized Hiring Plan reports to combine both employees and contractors or to separate departments for more restrictive access to other users. You are also able to customize what fields to show on each report.
Example - Creating A Hiring Plan Report For R&D Leadership
For headcount planning, the R&D department can be tricky to tackle since only the select few on the R&D leadership team can understand the technical requirements for releases on the product roadmap and how to hire accordingly. Delegating this task to the R&D leaders most knowledgeable about this matter can save you, the business operator quite some time. With this custom report feature, you can choose only to share the department-specific headcount information with the R&D leaders without having them see the headcount plan for the company overall.
Creating A New Hiring Plan Report
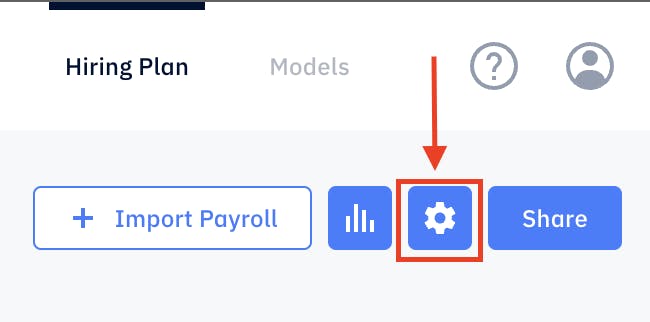
To create a new Hiring Plan report, first, go to "Hiring Plan" and click on the gear icon located at the top right corner of the page.
You will be directed to the "Hiring Plan Settings" page. Find and select "Reports" on the left-hand column. Once you are on the "Reports" page, click "New Report" at the top-right corner.

A new report will be generated under the default "Employees" and "Contractors" reports.
Customizing The Hiring Plan Report
Once you have created the new report, let us give the report a unique name and choose the "Hire Type", "Fields", and "Departments" to show.
To rename the report, hover the title "New Report", click on the pen icon that appears, type in "R&D", and hit enter.

For "Hire Type", we will need the R&D leadership to review and manage both employee and contractor headcounts. So let us check the circle before "Both" for the "Hire Type" row.

Next, under "Hire Type", the "Fields" row is where you select the headcount information to show and to be managed on this report. By default, all available fields sit under "Hidden Fields". To show a field on the report, simply click on the field (say "Name") to move it to "Available Fields".
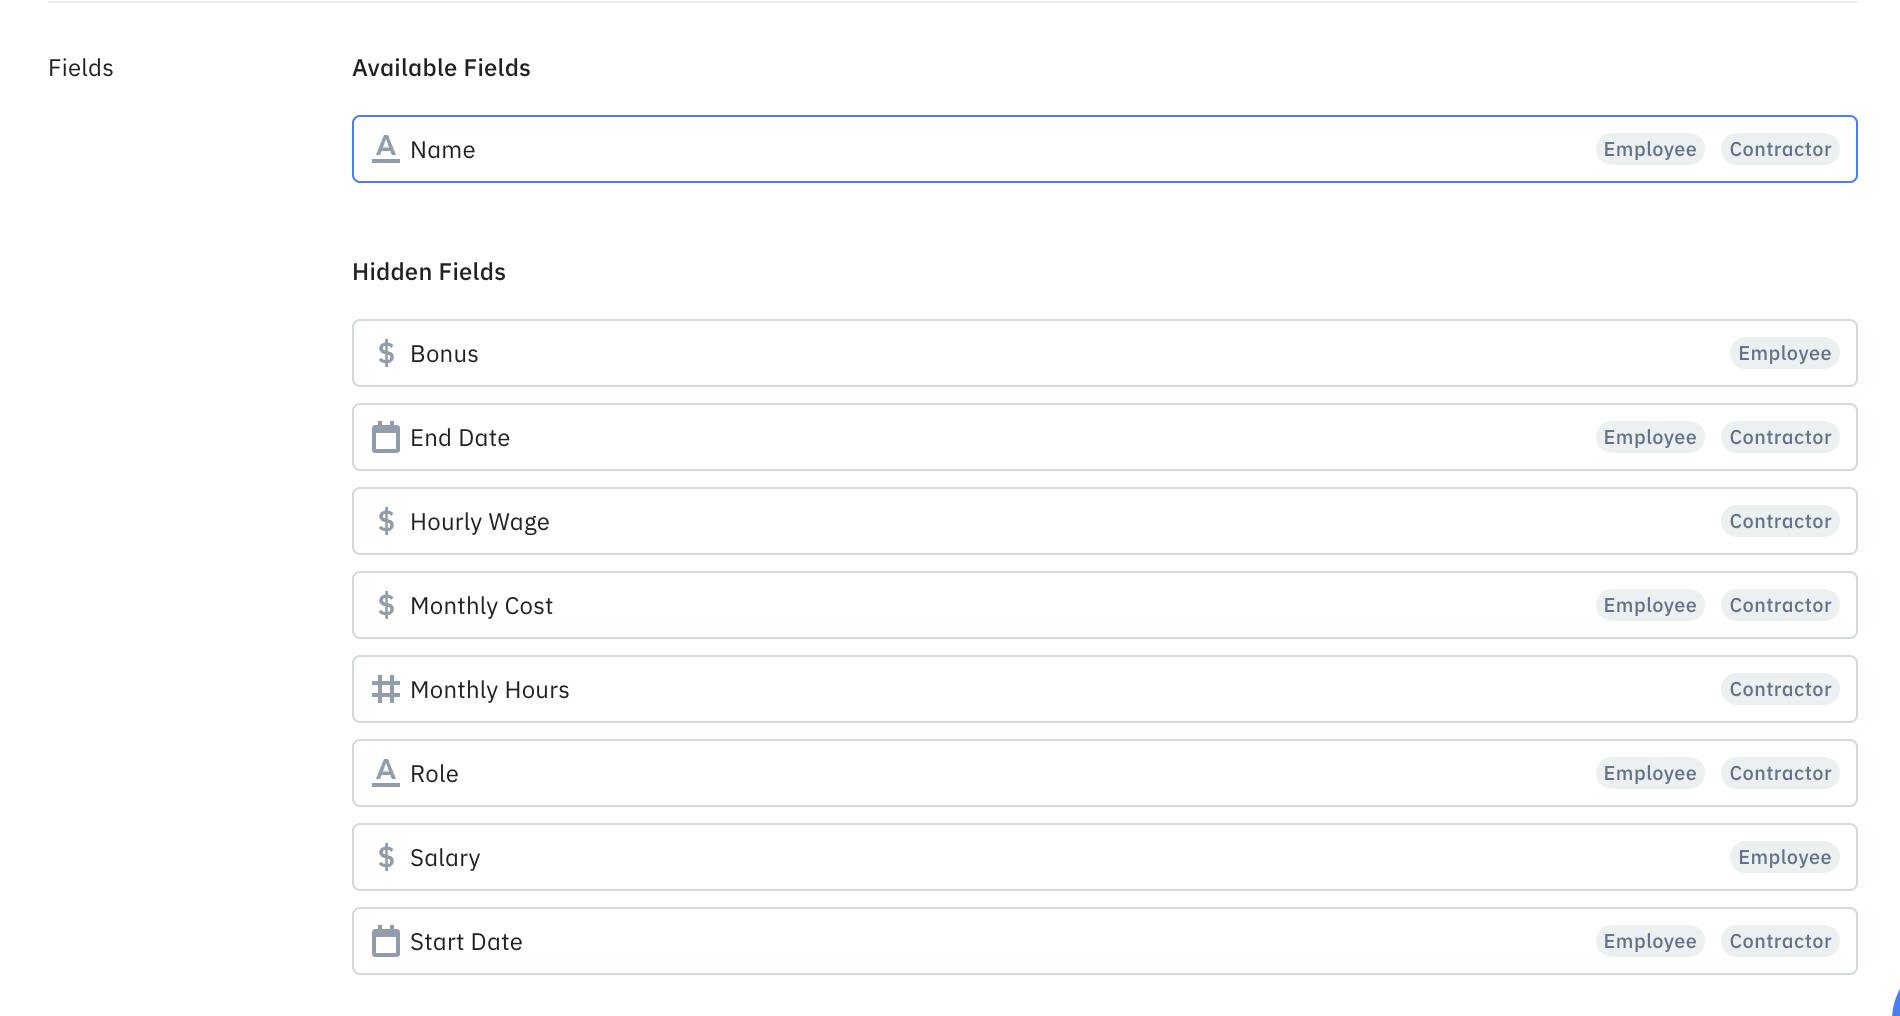
We would like to give all the headcount information to the R&D leadership to tinker their hiring plan with. So we will click on all fields moving them to "Available Fields".
TipThe temporal order you click on the fields is the order they will appear under "Available Fields" and also the order these field columns will appear on the report (from left to right). To adjust the order, click the fields you would like to move under "Available Fields" to "Hidden Fields". Then, click on them again under "Hidden Fields" in the order you would like them to show.
For "Departments", let us click on "R&D" under "Hidden Fields" moving it to "Available Fields". The mechanics for selecting departments work the same way as selecting fields.
Once you finish the steps above, click on the left arrow next to "Hiring Plan Settings" to see our newly created "R&D" hiring plan report.
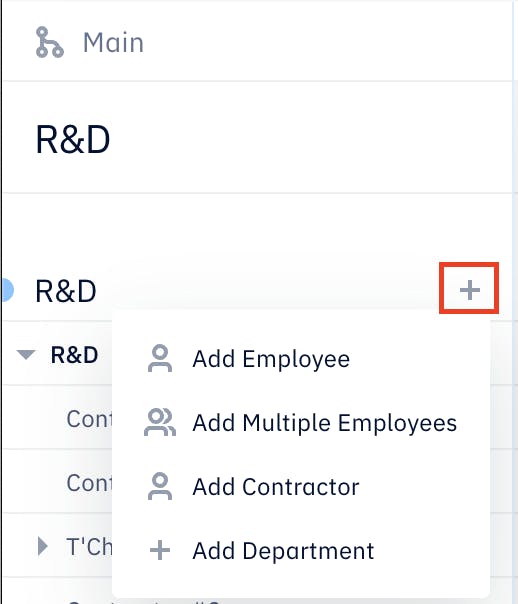
You can add the R&D hires directly on this "R&D" report following the same steps we use to add hires for the company overall (guide here).
The added new hires and changes made to existing hires on this report will automatically follow into the overall company hiring plan report.
TipWhen you are adding contractors, remember to leave the "Salary" field empty since contractors are planned by the product of Monthly Hours and Hourly Wage. Any amount you enter into "Salary" for a contractor will not change their monthly cost nor payroll total.
Sharing the Report with Department Leadership
After prepping the report, you are now ready to share it with your R&D department leaders and have them manage the headcount planning for their department.
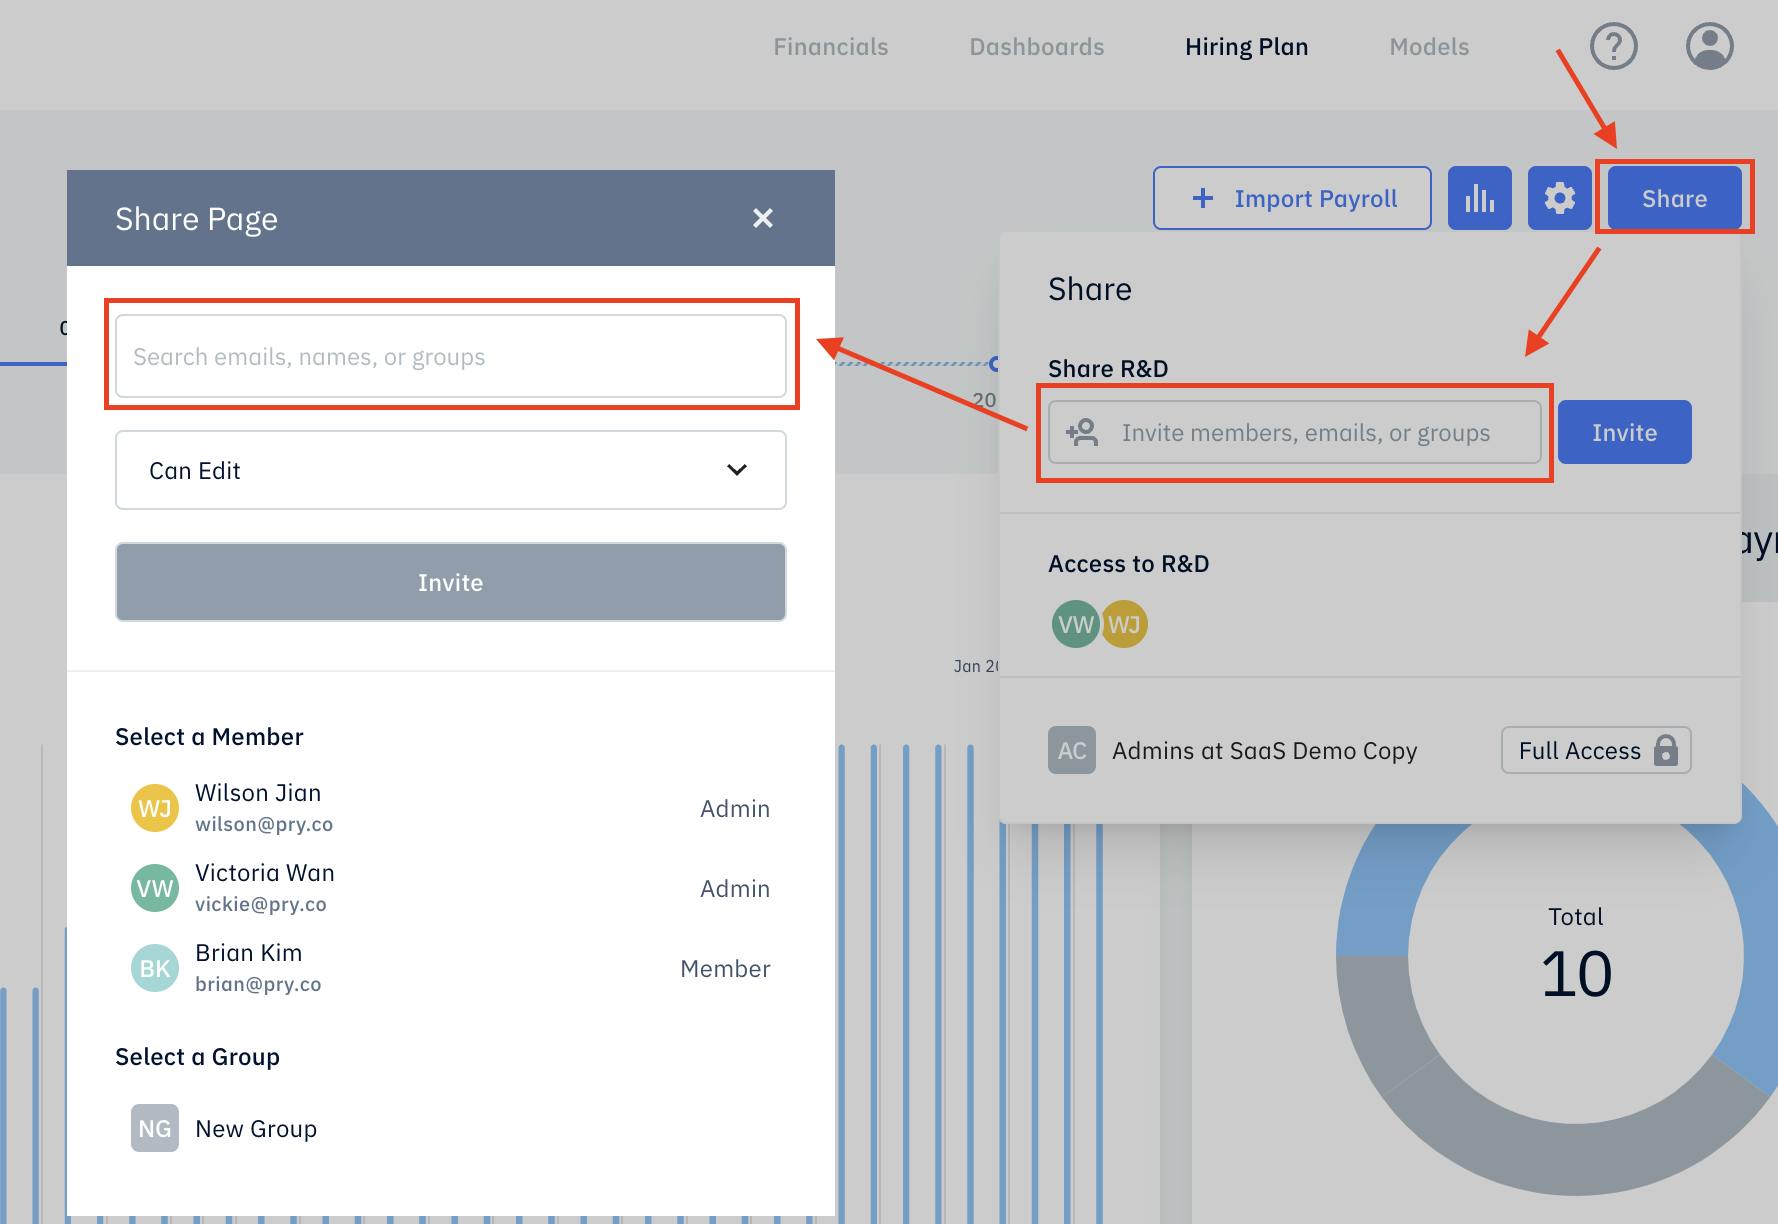
The simplest way to grant edit access to this report is through the "Share" button on the top right corner of this report page. Click on the "Share" button, then click the box under "Share R&D". In the popped-up window, type in the R&D leaders' email addresses in the top box, and select "Can Edit" in the dropdown in the second box from the top. Then, click "Invite"
Also, check out the various way you can grant the R&D leadership team the "Edit" access to this hiring plan report in our "Roles & Permissions" guide here.